Wedding Song - God Knew That I Needed You

Showing posts with label my own design. Show all posts

Sunday, August 7, 2022

MOD BABY JACKET & EARFLAP HAT; NB-3 MO. GIRL; Knit – Bulky Weight Yarn

This baby jacket is a match for the previous baby jacket I designed, and posted 😊


Newly designed Jacket with Hat to match.

Materials: 200g of any brand Bulky Yarn (#5 weight) MC & CC; #11 knitting needles – straight; #L crochet hook; 3 medium stich holders; 4 pieces CC scrap yarn, about 3-inches in length; tapestry needle; elastic thread; 3 1” resin buttons

Size: NB to 3 MO

Terms Used:

MC = main color

CC = contrast color

CO = cast on

K = knit

P = purl

st st = stockinette st (knit 1 row – purl 1 row)

sl st = slip stitch (insert crochet hook in back loop and pull thread through, moving onto next st and repeating process)

inc = increase

dec = decrease

x = repeat pattern process

yo = yarn over

tog = together

EO = end off


Jacket Back: With MC, CO 26 st and work in st st fo 9½ -inches. Place 7 sts on a st holder (front)/12 sts (neck back) on a st holder/remaining 7 sts on last st holder (front).

Right Front (Buttonhole side; Girl): Slip sts of this holder onto needle; attach yarn and knit across 7 sts – increasing 2 sts at end of row. P next row. Continue in st st, and inc 2 sts every k row x3 (15 sts on needle). Now P 1 row & K 1 row. Begin to work BUTTONHOLES: K2, yo, k2tog for each buttonhole; make two more buttonholes in same manner, spaced 1½ -inches between.

Work even in st st, until entire piece measures 9½ -inches from shoulder. EO

Back of Neck: Leave sts on holder.

Left Front: K across 7 sts on holder. P next row & inc 2 sts at end of row. Continue in sts st, and inc 2 sts every p row x3 (15 sts on needle).

Work even in st st, until entire piece measures 9½ -inches from shoulder. EO

Sleeves: With scrap yarn bits, mark sleeve settings 4¼ -inches from shoulders (both sides of work). With #L crochet hook, pickup and knit 24 sts between marked area; work in st st on these sts for 4 rows – and dec 1 st of next row. Repeat dec every other row x3 (16 sts on needle). Work eve in st st until sleeve measures 5” from shoulder. EO

Repeat instructions on opposite side for second sleeve.

Remover scrap yarn markers and save for button placements.

Sew side and sleeve seams.

Collar: From front of work, pick up and k 30 sts along front & back necklines. P next row (underside of collar). Work in st st until collar measures 4”. With back of collar facing you, begin at right edge, and trim around collar a with MC sl st crochet edging. EO

Fold buttonhole front over plain front piece, and mark button placements by threading tapestry needle with a piece of scrap yarn and drawing yarn through center st showing through buttonhole hole … this will make an accurate button placement that lines up properly with buttonhole.

Hold jacket with Right Front side facing you, and with CC color, work a sl st edging around entire jacket body for a nice finish 😊 Sew buttons in place.
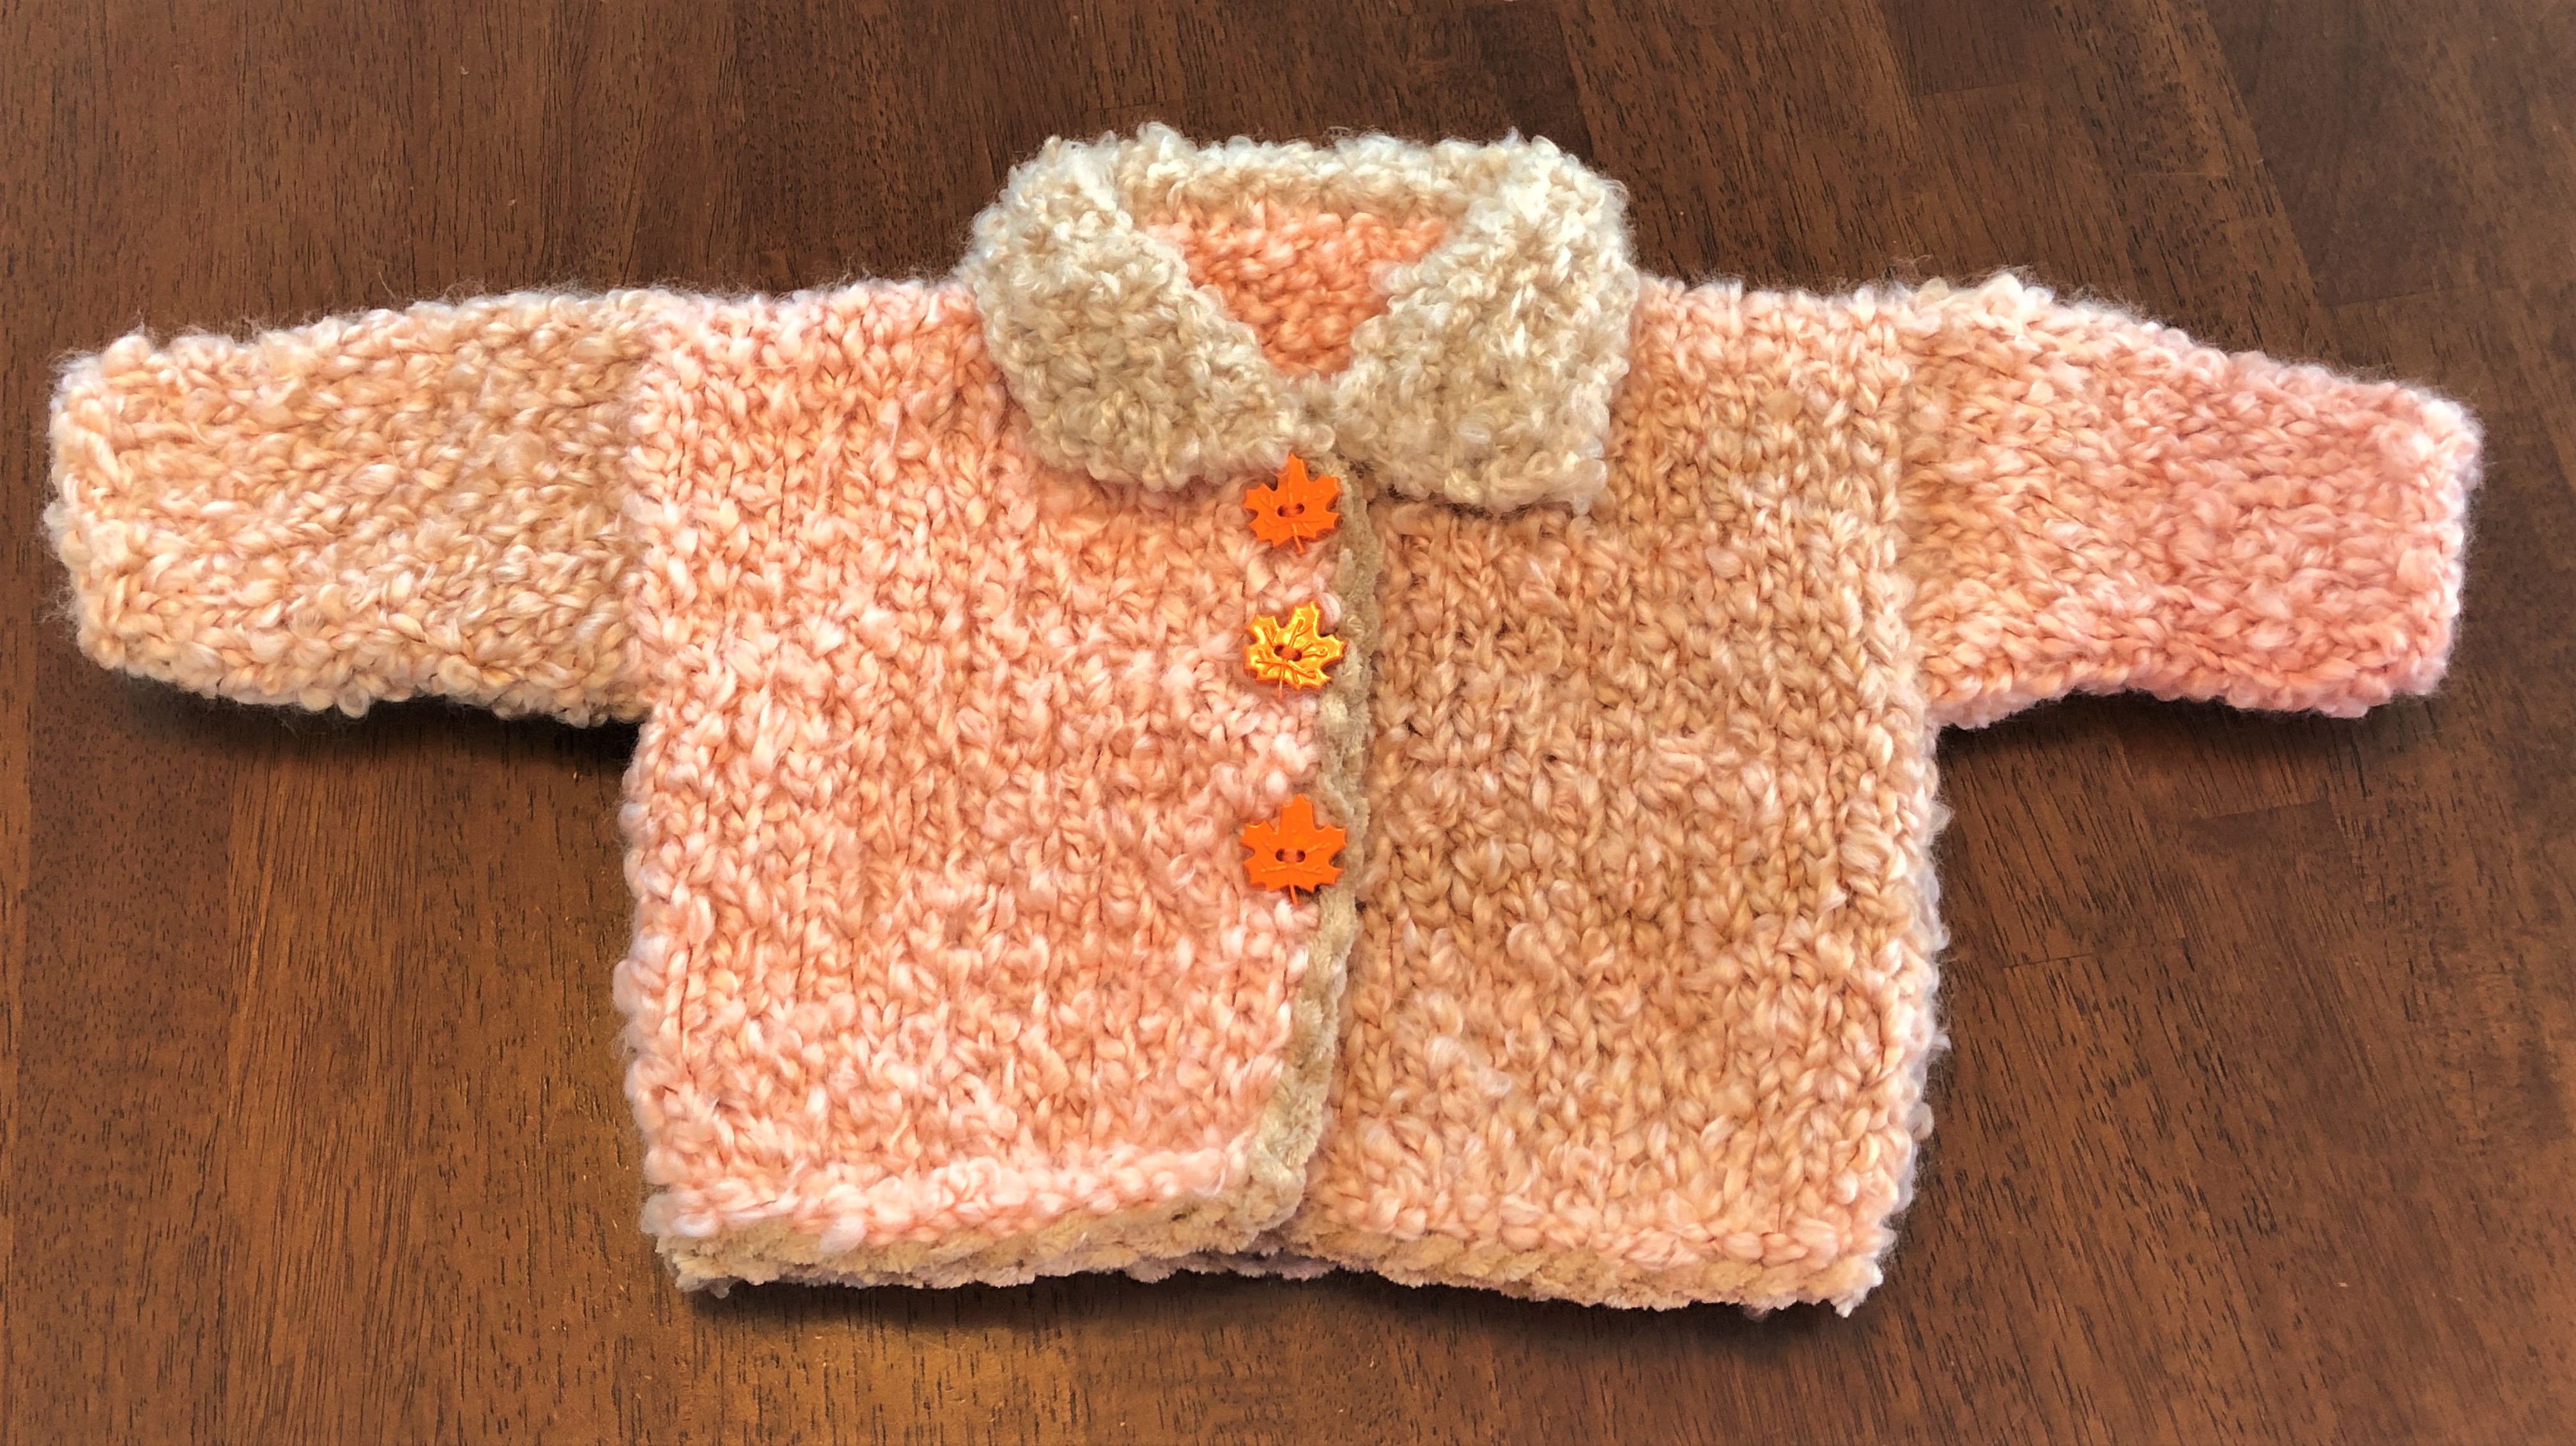
Finished! Homespun yarn, with Cashmere yarn edging.

Earflap Hat can be found at this link: https://melodys-makings.com/wp-content/uploads/2015/08/I-Cord-Earflap-Hat-Knitting-Pattern.pdf


Tuesday, August 2, 2022

MOD KNIT BULKY BABY JACKET & EARFLAP HAT ~NB-3 MO; BOY

The jacket is my own design; the earflap hat pattern, I found surfing the internet 😉

Jacket & Hat Set Completed; NB to 3 MO - BOY

A friends gave me an 'Itty-Bitty Knits for Baby booklet' a few years back, and it had a jacket pattern that looked interesting to me ... but I didn't like the garter st pattern (I wanted something a little softer, like what I designed the other night). I also thought softer shoulders (without bulky seams) would feel better on a little body  so I designed that, too. I like flatter collars, too: so that became a feature in my design.

Basically, I reworked the entire original pattern  and to be quite honest, I think my design looks better, and will feel better on a little baby body.

This pattern really is my own design. I haven't done anything other {designer's} don't do. Every designer builds on another's foundation: but they tweak the foundation to suit their own purposes.

I hope you enjoy this reworked pattern. I know I enjoyed working it ... and the next one will go a lot quicker, because I won't be working with needles in one hand, a vision before my eyes, and a pen in the other hand. Time will be significantly reduced, so I can't tell you how long it will take to knit the jacket  all I can say is I started after Supper, and that it was finished before bedtime ðŸ˜‰

You can complete the hat while watching your favorite movie ðŸ˜Š

Materials: 200g of any brand Bulky Yarn (#5 weight); #11 knitting needles – straight; #L crochet hook; 3 medium stich holders; 4 pieces CC scrap yarn, about 3-inches in length; tapestry needle; elastic thread; 3 1” resin buttons

Size: NB to 3 MO

Terms Used:

CC = contrast color

CO = cast on

K = knit

P = purl

st st = stockinette st (knit 1 row – purl 1 row)

inc = increase

dec = decrease

x = repeat pattern process

yo = yarn over

tog = together

EO = end off


Jacket and hat make up very quickly – you can have the set completed in a day’s time … a day and a half if you have a life outside of sitting and knitting 😊

Jacket Back: CO 26 st and work in st st fo 9½ -inches. Place 7 sts on a st holder (front)/12 sts (neck back) on a st holder/remaining 7 sts on last st holder (front).

Right Front: K across 7 sts on holder & inc 2 sts at end of row. P next row. Continue in sts st, and inc 2 sts every k row x3 (15 sts on needle).

Work even in st st, until entire piece measures 9½ -inches from shoulder. EO

Right Front Neck Shaping.

Back of Neck: Leave sts on holder.

Left Front (Buttonhole side; boy): Slip sts of this holder onto needle; attach yarn and knit across 7 sts. P next row – increasing 2 sts at end of row. Continue in st st, and inc 2 sts every p row x3 (15 sts on needle). Now K 1 row & P 1 row. Begin to work BUTTONHOLES: K2, yo, k2tog for each buttonhole; make two more buttonholes in same manner, spaced 1½ -inches between.

Left Front Shaping & Buttonholes - Boy.

Work even in st st, until entire piece measures 9½ -inches from shoulder. EO

Sleeves: With scrap yarn bits, mark sleeve settings 4¼ -inches from shoulders (both sides of work). With #L crochet hook, pickup and knit 24 sts between marked area; work in st st on these sts for 4 rows – and dec 1 st of next row. Repeat dec every other row x3 (16 sts on needle). Work eve in st st until sleeve measures 5” from shoulder. EO

Repeat instructions on opposite side for second sleeve.

Jacket Body & sleeves completed.

Remover scrap yarn markers and save for button placements.

Sew side and sleeve seams.

Collar: From front of work, pick up and k 30 sts along front & back necklines. P next row (underside of collar). Work in st st until collar measures 4”. EO

Starting Collar; purl sts on backside; st st on front side, to be turned down when finished.

Fold buttonhole front over plain front piece, and mark button placements by threading tapestry needle with a piece of scrap yarn and drawing yarn through center st showing through buttonhole hole … this will make an accurate button placement that lines up properly with buttonhole.

MOD Jacket FINISHED!
Original Design – I really do think my design is more appealing …

Earflap Hat can be found at this link: https://melodys-makings.com/wp-content/uploads/2015/08/I-Cord-Earflap-Hat-Knitting-Pattern.pdf

Wednesday, May 18, 2022

MOD CROCHET PEEKABOO BLUE BABY BLANKET PATTERN ~Full Receiving Size - Boy

MOD Peekaboo Blue Baby Blanket FINISHED; 30”-W x 30”-L. Boy; Crochet. Baby Sport.

I designed, and started work on this baby blanket two days ago, but Life kept interrupting; I just finished it 😊

The stitches are simple, quick, and easy.

Stitch Pattern for MOD Peekaboo Blue Baby Blanket.

Materials: Blue – Super-Size skein, Bernat Baby Sport yarn; a coule ounces of CC Baby yarn; #G or 6/4¼ Susan Bates aluminum crochet hook; Scissors, Tapestry Needle

Terms:

ch = chain

cc = single crochet

dc = double crochet

rpt = repeat

ea = each

bet = between

MC = main color

CC = contrast color

T = turn

EO = end off


With MC, make a ch of 120 ct; sc ea st across row. Ch 1 - T.

Row 1: Sc in 2nd ch from hook, sc in next ch, *ch 2, skip next 2 ch, sc in ea of next 2 ch; rpt from * across row: T.

Row 2: Ch 3 (counts as dc), 4 dc in e ach-2 space across to last loop, skip next sc, dc in last sc: T.

Row 3: Ch 1, sc in first dc, sc bet first 2 dc, *ch 2, skip next 4 dc, sc bet last skipped dc and next dc; rpt from * across row – ending with sc bet last 2 sts, sc in 3rd ch of turning ch: T

Repeat rows 2 & 3 for pattern to a length of 30”.

Then sc 120 sts evenly across top edge; ch 1, turn and work another row of sc across top edge + 1 extra sc in the corner. Work 112 sc evenly along the side + 1 extra sc in corner … 120 sts across bottom edge + 1 extra sc in corner… and 112 sc up the other side edge, + 1 extra sc in the corner. EO MC.

You are now ready to add the trim.

Corded Edging: With CC, work a row of sc backward, instead of forward. The stitches cross at the top and give a nice decorative beaded finish to the blanket. EO and weave in all ends.

Monday, March 21, 2022

MOD Crochet Book Cover

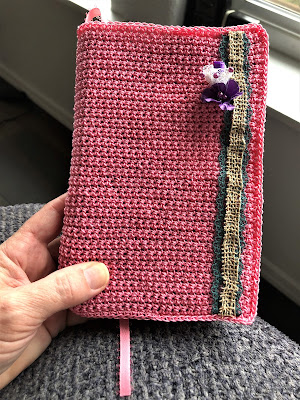
New Cover Finished; shabby chic ðŸ˜‰

I enjoyed a hot mug of lemon tea this morning; and watched Pt. 2 of Jesus of Nazareth … and worked up another of my own designs: I wanted a new book cover since books have become my main companion since Bob’s spirit stepped off Earth – I’ll probably craft a slew of them to match seasons, clothes, purses, ect.

I’ve become known as ‘the Book Lady’ around restaurants in town … and just as I wouldn’t wear the same outfit every week, my latest read shouldn’t be seen in the same cover, either: told’ya I’m weird 😉

I designed and crafted this book cover about 25 years ago; but I am working on a new cover, so I thought I’d share the pattern 😊

Original, decades old, MOD Book Cover.

It’s simple.

It’s quick.

It’s easily adaptable.

This book cover can be finished with a sc page marker … or a satin ribbon marker, sewed in place.

I am using my original chicken scratch written instructions, so I hope it will not be too confusing. Let me know if you have trouble, and I will answer your questions.

Materials: #10 Aunt Lydia’s Crochet Cotton Thread, #0 Crochet Hook, trims (optional), coordinating sewing thread if using trims, 11½” satin ribbon (optional), sewing pins, sewing needle, small amount of contrasting throw-away thread, tapestry needle.

Sts Used:

Ch = chain

Sc = single crochet

CC = contrasting

St = stitch

Ct = count

EO = end off/cut thread.


Row 1: Begin by making an 85 st foundation chain of sc; ch 1, turn.

Row 2: Sc across row (84 sts); ch 1, turn.

Repeat row 2 for a total of 54 rows (or length needed for your book cover – some books are higher, some are lower). DO NOT CUT THREAD – loosely tie end, because you will be using it again.

With CC thread and tapestry needle; count 14 sts from each end, and fold those inwards for the cover lapels (to hold book in place).

If you plan on using trims, place a book into the cover – fold ends inward, and mark the fold with CC thread: also mark the front spine edgebeing careful not to untie/unravel the loosely tied end-of-row thread: this will help you accurately place the desired trim where you want it (centered – or towards the front edge) without the trim being ‘off kilter’ when the cover is finished and your book is in place inside.

Shape markings ...

Once you are satisfied with the trim placements, if you use them, pin them in place and tack them down kinda loosely with a swing needle and matching thread – books tend to stretch the cover a bit, you want the finish to look tidy, not stressed.

Placement of trims.

Go back to the loosely tied end-of-row thread: pickup st, and sc through both top st’s of book cover … and the 14-ct. cover lapel sts.; then sc around entire cover (repeating lapel instructions for second lapel) – and making a **crochet marker** at the center, where the spine center would be: sl st back up the maker foundation, and continue to sc edging pickup point, and EO.

Weave in loose ends.

**Sew the satin ribbon marker to the center top of the book cover AFTER EDGING S COMPLETED, if using that option. **

Sc edging around entire cover: 2 sc EA corner edge.

Ta-da! All done: enjoy! 😊

Sunday, February 13, 2022

MOD SPRING FLING RIPPLE LAPGHAN PATTERN

This lapghan pattern is worked in dc sts following the initial sc foundation.

I chose to use bright colored yarns because I like color in my life … and I like cheery colors in my world come Spring 😉

Materials: Super Saver Worsted weight yarn in colors of choice – 14 ounces MC – and about equal amount of leftover yarns of choice for CC1, CC2, & CC3; Size G hook; tapestry needle; scissors.

I chose Lemon Yellow for my MC – with Ombre Jazzy Pink/CC1, Ombre Green Apple/CC2, & Ombre True Blue/CC3.

PATTERN: With MC, ch 169.

MAIN COLOR STRIPE - Row 1: 1 sc in 2nd ch from hook, 1 sc in each of next 6 ch, *3 sc in next ch, 1 sc in each of next 7 ch, skip 2 ch, 1 sc I each of next 7 sc; repeat from * and end last repeat with 1 sc in each of 6 ch, skip 1 ch, 1 sc in last ch; ch 3.

Row 2: Turn – skip first st, *1 dc in back loop of each of 6 sts, 3 dc in back loop of next st, 1 dc in back loop of each next 7 sts, skip 2 sts; repeat from * and end last repeat with 1 dc in back loop of each next 6 sts, skip 1 st, 1 dc in back loop of last st; ch 3.

Row 3: Turn – skip first st, *1 dc in front loop of each of 6 sts, 3 dc in front loop of next st, 1 dc in front loop of each next 7 sts, skip 2 sts; repeat from * and end last repeat with 1 dc in front loop of each next 6 sts, skip 1 st, 1 dc in front loop of last st; ch 3.

Continue repeating Rows 2 & 3 for established pattern, having **6 rows in MC, 6 rows of CC1, 6 rows MC, 6 rows CC2, 6 rows MC, 6 rows CC3** DO NOT CUT YARN you will carry MC yarn up the backside of lapghan as you work it and pick it up to be worked with each alternating dc st. Attach new color: When changing colors, always draw the new color through the last loop on hook before turning work.

Alternate MC and Color stripes until there are 8 count MC stripes, with MC stripe being the ending stripe. Cut MC and tie off. Neatly weave in loose ends.

Sunday, January 23, 2022

RIVERFRONT WALK

There is an air stagnation warning for our region until Wednesday afternoon – but the air quality was favorable this afternoon, so I went for a riverfront walk with a friend 😊

Riverfront Walk; 1.1 miles round trip.
Sun poking through the clouds.
A 'camo' tree is actually a sycamore hybrid.
The red branches were what originally caught my attention.

On the way home, I bought some boxes … and four more skeins of yarn 😉

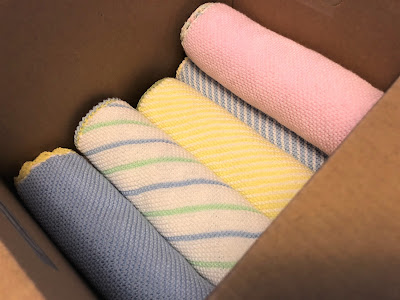
MOD Angel Baby blankets getting ready to be mailed off ...
Yarns for new designs.

I’ve finished knitting eight Angel baby Blankets; and I have crocheted decorative edging on seven of them, so far (they don’t need to be trimmed, but they look nicer if done this way): I think I’ll be able to pack sixteen to a box – if I loosely roll them, as shown in the picture above.

Keeping with my physical health routine, I also incorporated exercises into the day:


Standing Pilates for Arthritis | 20 Minute Gentle Workout and