Wedding Song - God Knew That I Needed You

Showing posts with label baby knitting. Show all posts

Sunday, August 7, 2022

MOD BABY JACKET & EARFLAP HAT; NB-3 MO. GIRL; Knit – Bulky Weight Yarn

This baby jacket is a match for the previous baby jacket I designed, and posted 😊


Newly designed Jacket with Hat to match.

Materials: 200g of any brand Bulky Yarn (#5 weight) MC & CC; #11 knitting needles – straight; #L crochet hook; 3 medium stich holders; 4 pieces CC scrap yarn, about 3-inches in length; tapestry needle; elastic thread; 3 1” resin buttons

Size: NB to 3 MO

Terms Used:

MC = main color

CC = contrast color

CO = cast on

K = knit

P = purl

st st = stockinette st (knit 1 row – purl 1 row)

sl st = slip stitch (insert crochet hook in back loop and pull thread through, moving onto next st and repeating process)

inc = increase

dec = decrease

x = repeat pattern process

yo = yarn over

tog = together

EO = end off


Jacket Back: With MC, CO 26 st and work in st st fo 9½ -inches. Place 7 sts on a st holder (front)/12 sts (neck back) on a st holder/remaining 7 sts on last st holder (front).

Right Front (Buttonhole side; Girl): Slip sts of this holder onto needle; attach yarn and knit across 7 sts – increasing 2 sts at end of row. P next row. Continue in st st, and inc 2 sts every k row x3 (15 sts on needle). Now P 1 row & K 1 row. Begin to work BUTTONHOLES: K2, yo, k2tog for each buttonhole; make two more buttonholes in same manner, spaced 1½ -inches between.

Work even in st st, until entire piece measures 9½ -inches from shoulder. EO

Back of Neck: Leave sts on holder.

Left Front: K across 7 sts on holder. P next row & inc 2 sts at end of row. Continue in sts st, and inc 2 sts every p row x3 (15 sts on needle).

Work even in st st, until entire piece measures 9½ -inches from shoulder. EO

Sleeves: With scrap yarn bits, mark sleeve settings 4¼ -inches from shoulders (both sides of work). With #L crochet hook, pickup and knit 24 sts between marked area; work in st st on these sts for 4 rows – and dec 1 st of next row. Repeat dec every other row x3 (16 sts on needle). Work eve in st st until sleeve measures 5” from shoulder. EO

Repeat instructions on opposite side for second sleeve.

Remover scrap yarn markers and save for button placements.

Sew side and sleeve seams.

Collar: From front of work, pick up and k 30 sts along front & back necklines. P next row (underside of collar). Work in st st until collar measures 4”. With back of collar facing you, begin at right edge, and trim around collar a with MC sl st crochet edging. EO

Fold buttonhole front over plain front piece, and mark button placements by threading tapestry needle with a piece of scrap yarn and drawing yarn through center st showing through buttonhole hole … this will make an accurate button placement that lines up properly with buttonhole.

Hold jacket with Right Front side facing you, and with CC color, work a sl st edging around entire jacket body for a nice finish 😊 Sew buttons in place.
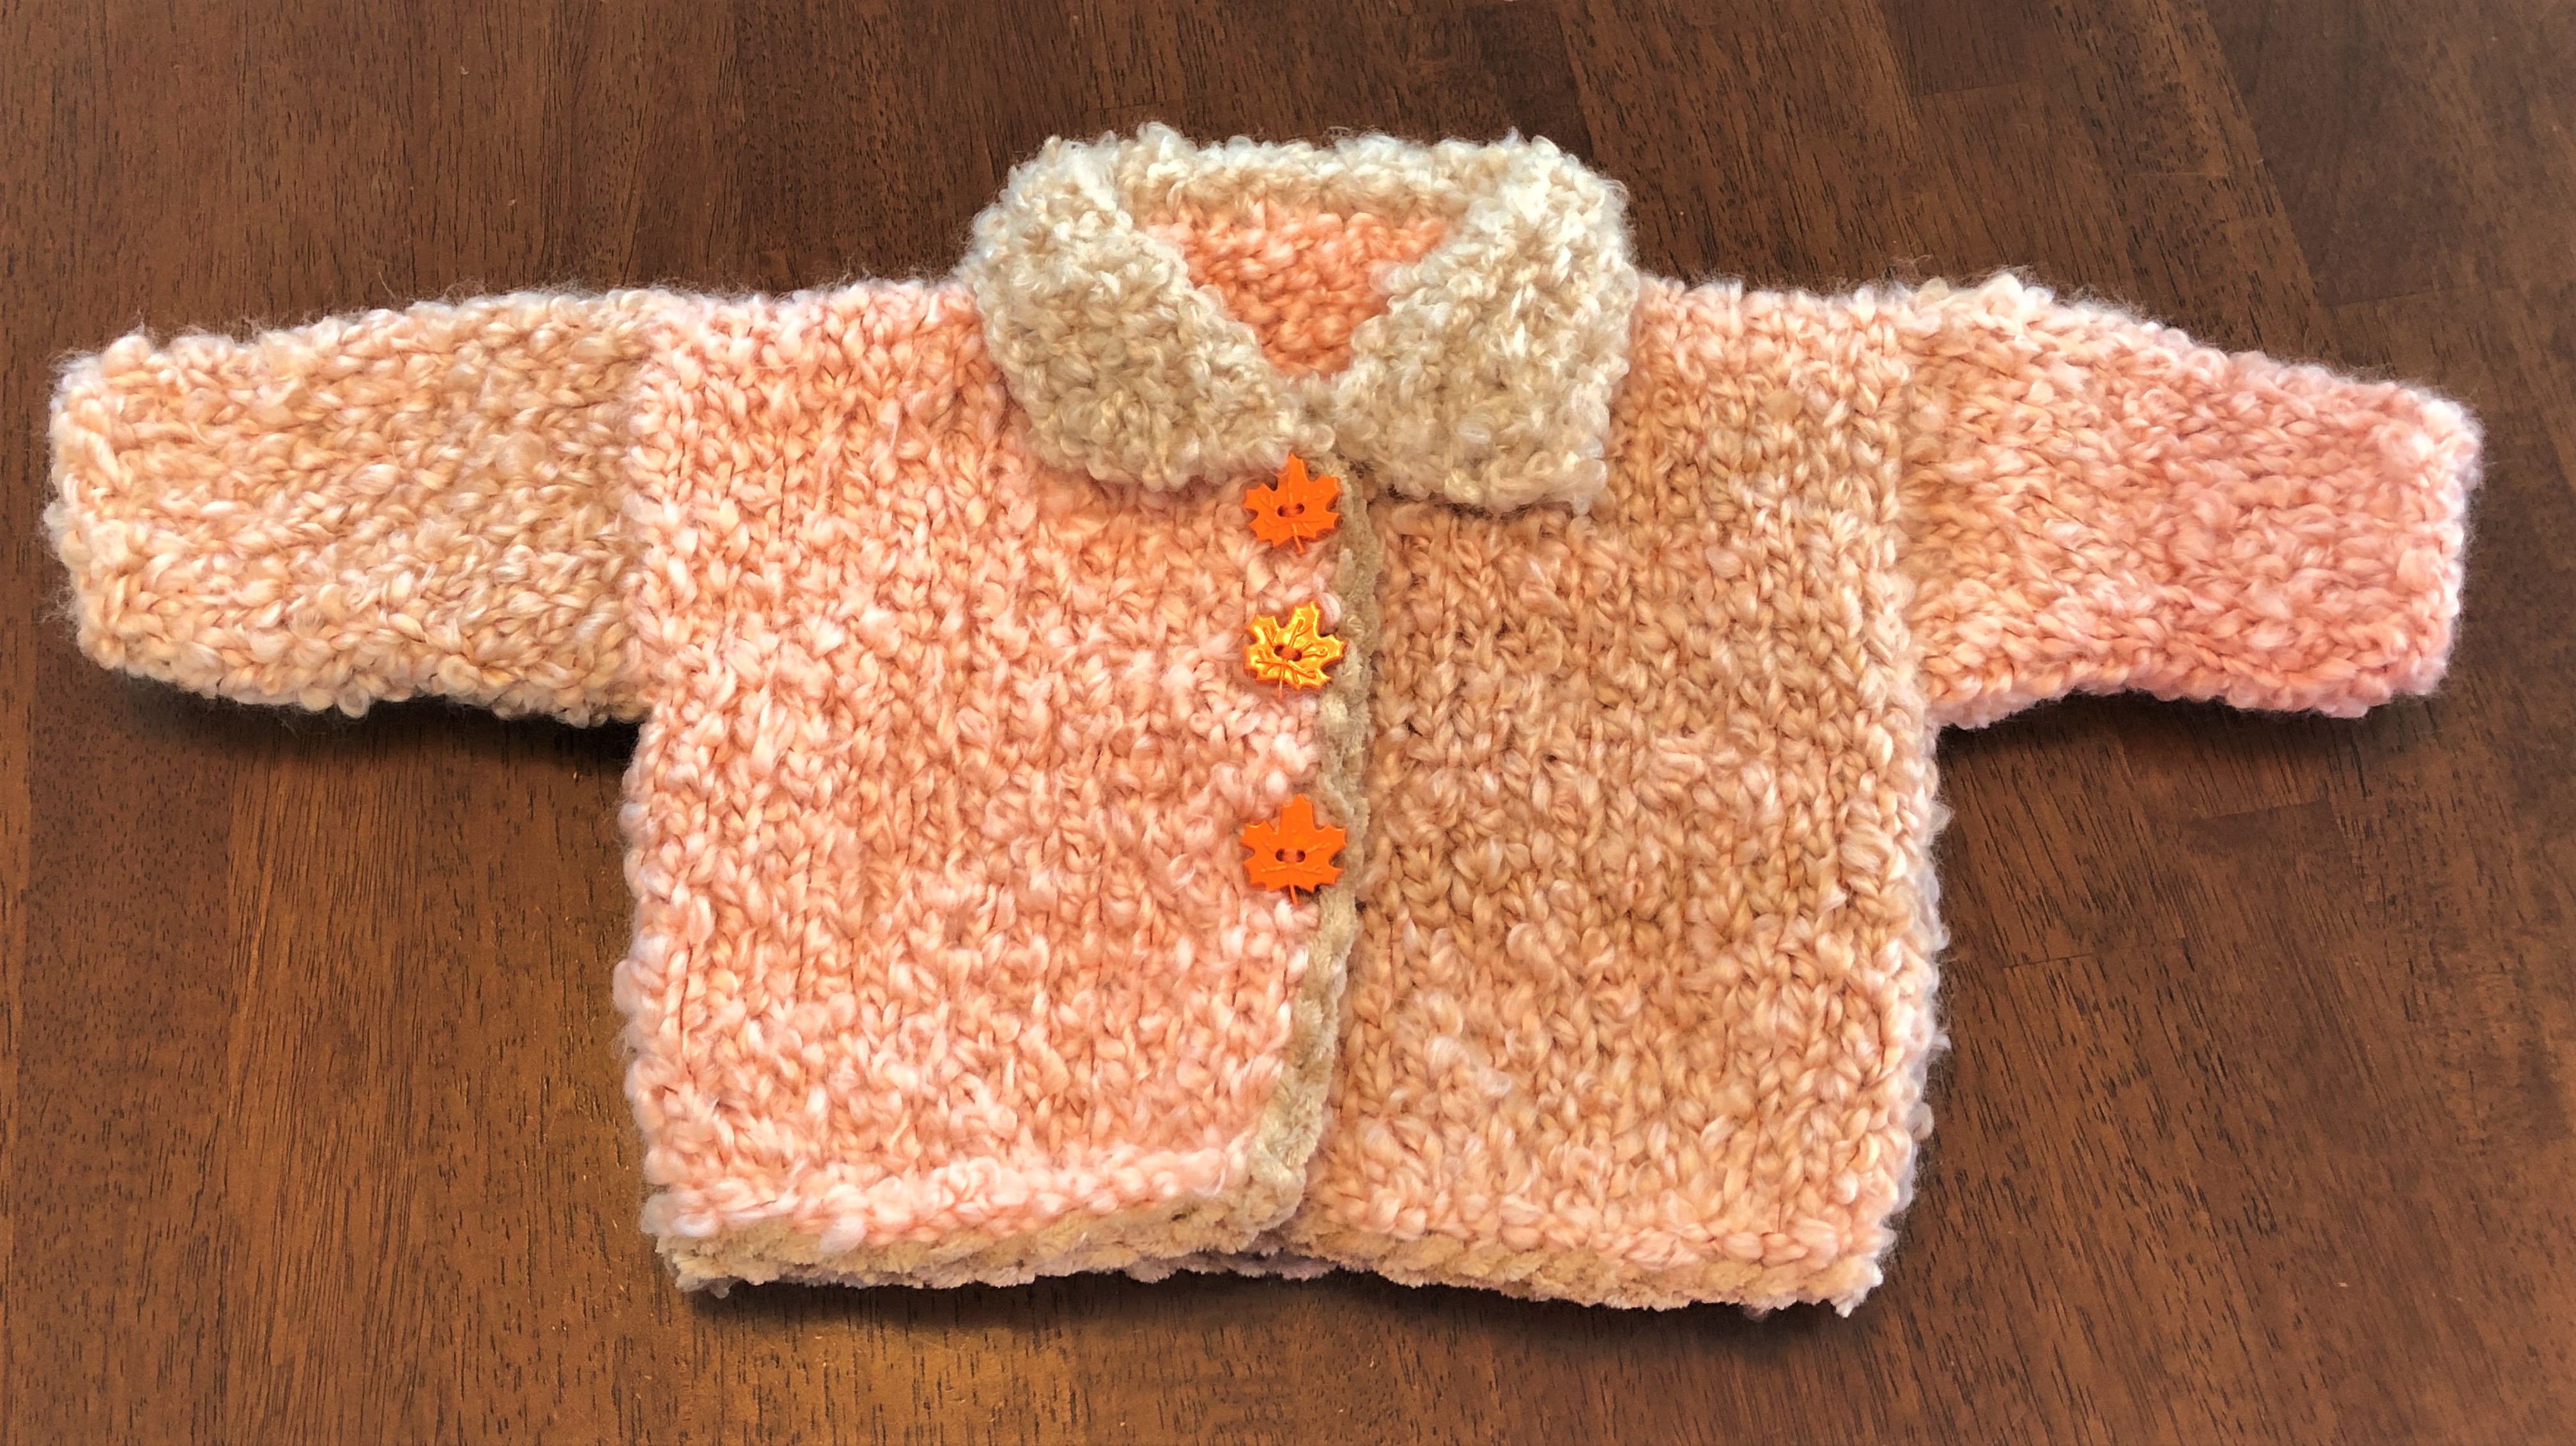
Finished! Homespun yarn, with Cashmere yarn edging.

Earflap Hat can be found at this link: https://melodys-makings.com/wp-content/uploads/2015/08/I-Cord-Earflap-Hat-Knitting-Pattern.pdf


Tuesday, August 2, 2022

MOD KNIT BULKY BABY JACKET & EARFLAP HAT ~NB-3 MO; BOY

The jacket is my own design; the earflap hat pattern, I found surfing the internet 😉

Jacket & Hat Set Completed; NB to 3 MO - BOY

A friends gave me an 'Itty-Bitty Knits for Baby booklet' a few years back, and it had a jacket pattern that looked interesting to me ... but I didn't like the garter st pattern (I wanted something a little softer, like what I designed the other night). I also thought softer shoulders (without bulky seams) would feel better on a little body  so I designed that, too. I like flatter collars, too: so that became a feature in my design.

Basically, I reworked the entire original pattern  and to be quite honest, I think my design looks better, and will feel better on a little baby body.

This pattern really is my own design. I haven't done anything other {designer's} don't do. Every designer builds on another's foundation: but they tweak the foundation to suit their own purposes.

I hope you enjoy this reworked pattern. I know I enjoyed working it ... and the next one will go a lot quicker, because I won't be working with needles in one hand, a vision before my eyes, and a pen in the other hand. Time will be significantly reduced, so I can't tell you how long it will take to knit the jacket  all I can say is I started after Supper, and that it was finished before bedtime ðŸ˜‰

You can complete the hat while watching your favorite movie ðŸ˜Š

Materials: 200g of any brand Bulky Yarn (#5 weight); #11 knitting needles – straight; #L crochet hook; 3 medium stich holders; 4 pieces CC scrap yarn, about 3-inches in length; tapestry needle; elastic thread; 3 1” resin buttons

Size: NB to 3 MO

Terms Used:

CC = contrast color

CO = cast on

K = knit

P = purl

st st = stockinette st (knit 1 row – purl 1 row)

inc = increase

dec = decrease

x = repeat pattern process

yo = yarn over

tog = together

EO = end off


Jacket and hat make up very quickly – you can have the set completed in a day’s time … a day and a half if you have a life outside of sitting and knitting 😊

Jacket Back: CO 26 st and work in st st fo 9½ -inches. Place 7 sts on a st holder (front)/12 sts (neck back) on a st holder/remaining 7 sts on last st holder (front).

Right Front: K across 7 sts on holder & inc 2 sts at end of row. P next row. Continue in sts st, and inc 2 sts every k row x3 (15 sts on needle).

Work even in st st, until entire piece measures 9½ -inches from shoulder. EO

Right Front Neck Shaping.

Back of Neck: Leave sts on holder.

Left Front (Buttonhole side; boy): Slip sts of this holder onto needle; attach yarn and knit across 7 sts. P next row – increasing 2 sts at end of row. Continue in st st, and inc 2 sts every p row x3 (15 sts on needle). Now K 1 row & P 1 row. Begin to work BUTTONHOLES: K2, yo, k2tog for each buttonhole; make two more buttonholes in same manner, spaced 1½ -inches between.

Left Front Shaping & Buttonholes - Boy.

Work even in st st, until entire piece measures 9½ -inches from shoulder. EO

Sleeves: With scrap yarn bits, mark sleeve settings 4¼ -inches from shoulders (both sides of work). With #L crochet hook, pickup and knit 24 sts between marked area; work in st st on these sts for 4 rows – and dec 1 st of next row. Repeat dec every other row x3 (16 sts on needle). Work eve in st st until sleeve measures 5” from shoulder. EO

Repeat instructions on opposite side for second sleeve.

Jacket Body & sleeves completed.

Remover scrap yarn markers and save for button placements.

Sew side and sleeve seams.

Collar: From front of work, pick up and k 30 sts along front & back necklines. P next row (underside of collar). Work in st st until collar measures 4”. EO

Starting Collar; purl sts on backside; st st on front side, to be turned down when finished.

Fold buttonhole front over plain front piece, and mark button placements by threading tapestry needle with a piece of scrap yarn and drawing yarn through center st showing through buttonhole hole … this will make an accurate button placement that lines up properly with buttonhole.

MOD Jacket FINISHED!
Original Design – I really do think my design is more appealing …

Earflap Hat can be found at this link: https://melodys-makings.com/wp-content/uploads/2015/08/I-Cord-Earflap-Hat-Knitting-Pattern.pdf