For the past month, I’ve been working
steadily on 15-inch Angel Baby Blankets, managing to get one done over a
2-day-span of time: they are small and make up quickly, but I do have a social
life, too, that thankfully keeps me out-of-house most of the daylight hours 😉
I thumbed through 3 of my favorite dog-eared stitch
pattern books, and came up with some real nice designs. Most stitch patterns
are too wide for such a small project … and the stitch patterns that fit
perfectly get boring done over, and over, and over again: so, I reworked a few
of the larger pattern stitch deigns to fit the 15-inch requirement, and I think
they turned out pretty nice 😊
Blankets #3, #9, #11 are totally my own designs; I haven’t seen anything like them online or in pattern books, and I didn’t have to repeatedly recalculate the stitch count formats – I just worked them up ‘on the fly’ as I watched old black-n-white noir movies on Youtube, and sorted through my yarn stash.
These patterns can be used for full sized baby blankets too: just rework the stitch count.
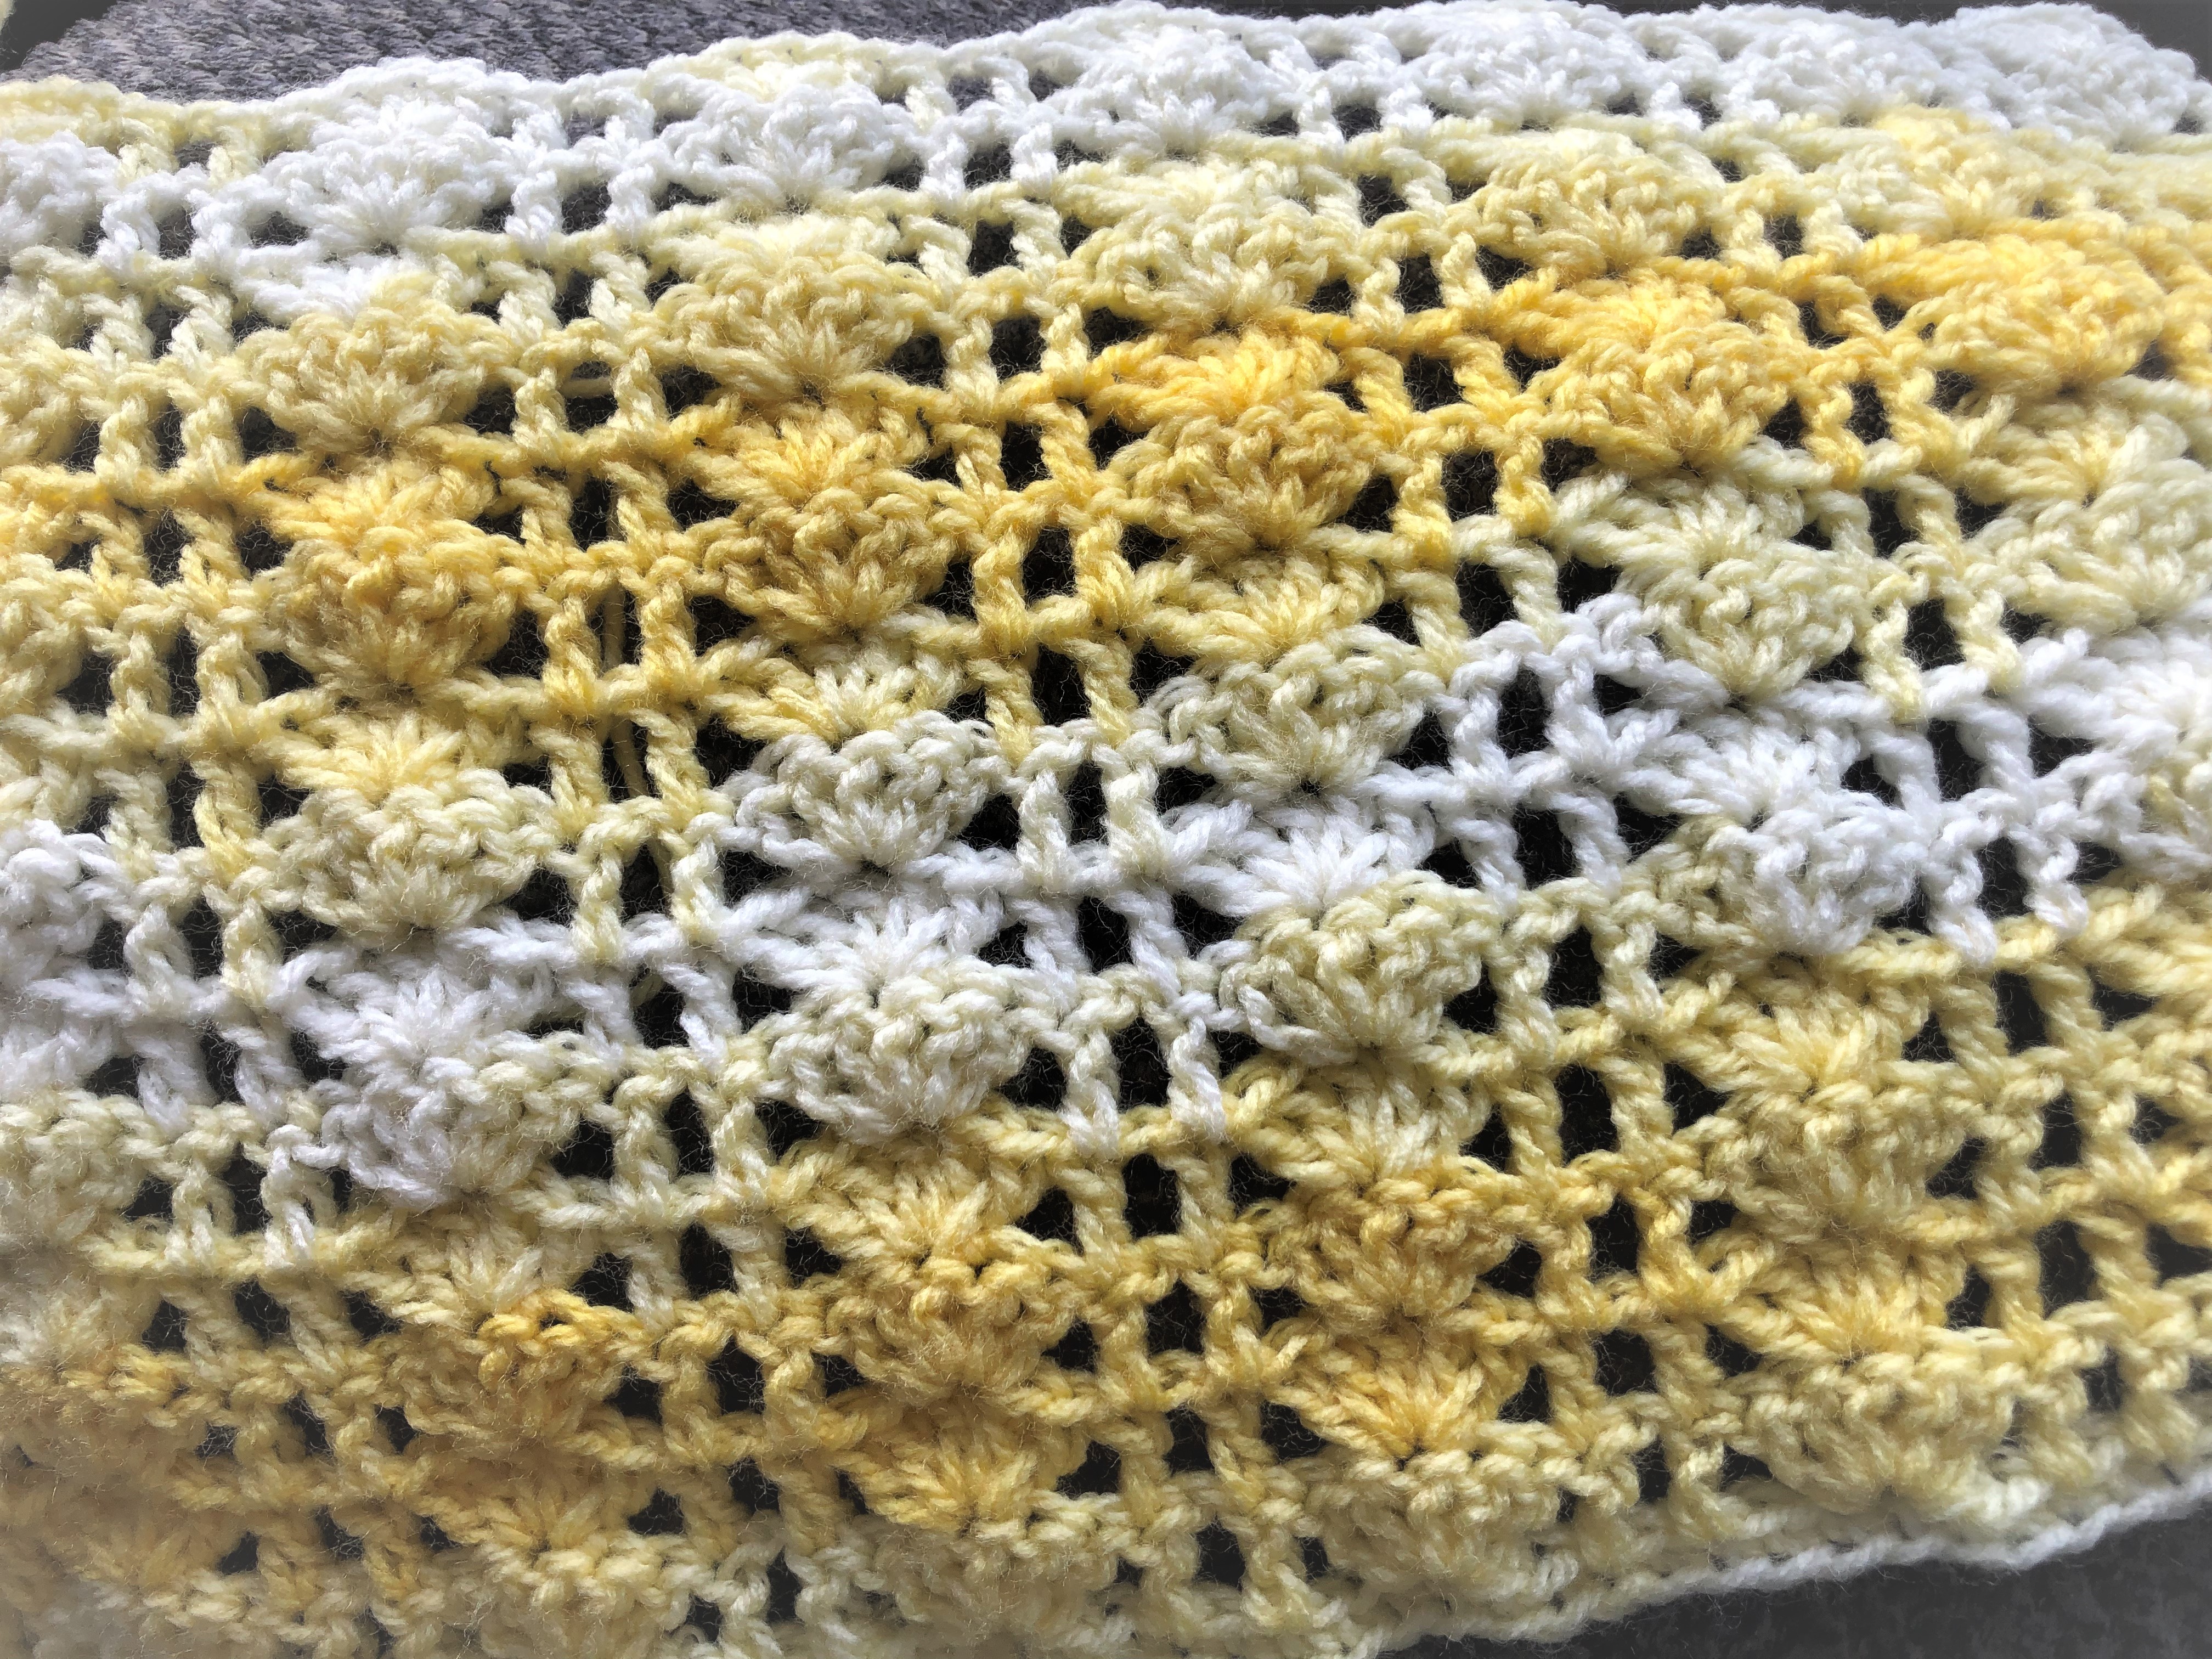
(1) MOD PINNACLE STITCH ANGEL
BABY BLANKET
This pattern uses three colors; A-Mint (Boy) or
Pink (Girl), B-Yellow (Boy) or Peach (Girl) & C-White.
For full-size baby blanket, the
pattern uses a number of ch divisible by 14 + 1, ch 2 – T.
Terms used:
ch = chain
sts = stitches
sc = Single crochet
ea = Each
rpt = repeat
Begin with A, and make a ch of 99 sts.
Row 1: 1 sc into 3rd ch from hook, *1 sc into ea of the next 5 ch, skip 3 ch, 1
sc into ea of the next 5 ch, 3 sc into the next ch, rpt from * to end of row; end with 2 sc into last ch
instead of 3.
Row 2: 1 ch, 1 sc into same place, *1 sc into ea of the next 5 sc, skip 2 sc, 1 sc into ea of the
next 5 sc, 3 sc into next sc, rpt from * to end of row; end with 2 sc in turning st.
Repeat row 2 throughout, working 2 more rows
with A (4 rows total); then being color pattern as follows: 4 rows in B,
2 rows in C, 4 rows A … until you have worked a 15-inch square.
Edge with C for contrast color edging along
top and bottom – and having 53 sts of C down ea side.
(2) MOD STRAIGHT GRANNY STITCH
ANGEL BABY BLANKET
This pattern is worked in a straight square
(turning each end and working from side to side each row), using the granny
square stitch.
This pattern uses two colors; MC-Blue (Boy) or
Lilac (Girl) & CC-White.
For full-size baby blanket, the
pattern uses multiples of 4 + 1.
Terms used:
MC = main color
CC = contrast color
T = turn
ch = chain
sts = stitches
sc = Single crochet
ea = Each
rpt = repeat
EO = end off
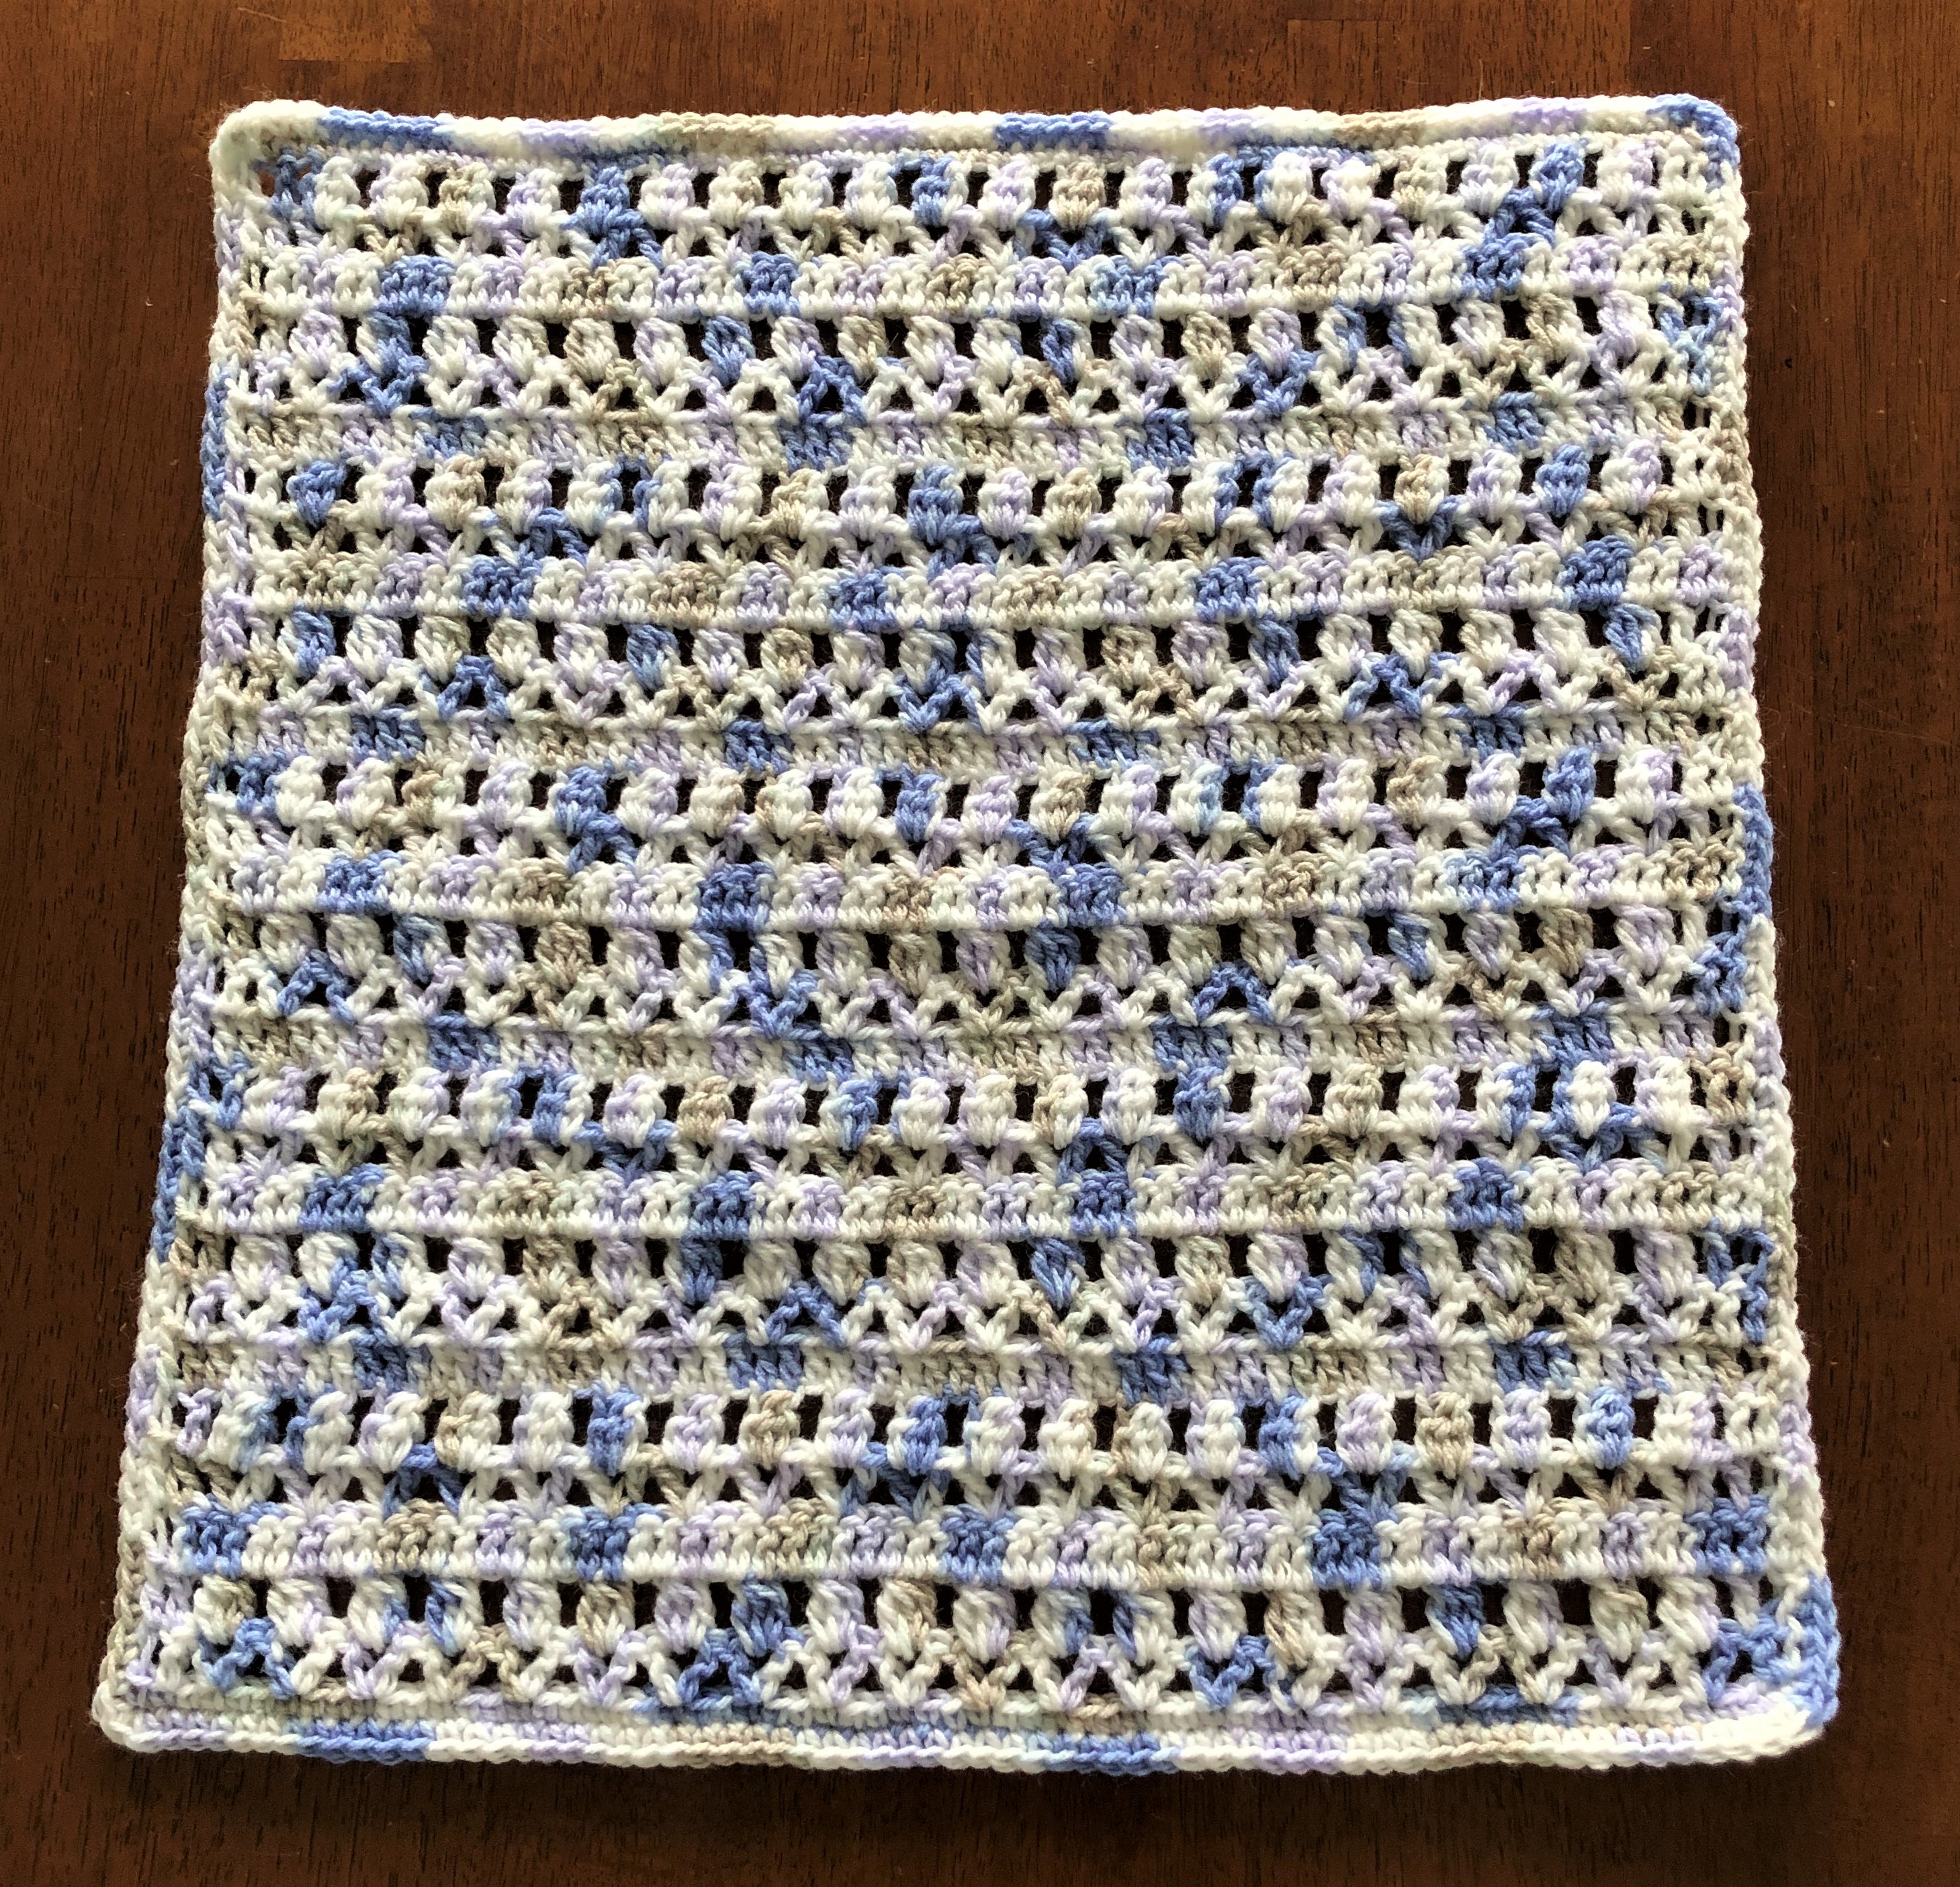
I made this little blanket in one color
throughout, using a contrast color for edging trim.
Begin with MC, and make a ch of 65 sts. Work
a foundation row of sc across; ch 3 – T.
Row 1: Make 4 dc in 3rd st, *skip next 3 ch, 4 dc in next ch; rpt from * across row; end with skip 2 sts,
and dc in last st. Ch 1 – T.
Row 2: Sc in each dc across; ch 3-T.
Row 3: Skip 1 sc, 2 dc in next sc, *skip next 3 sc, 4 dc in next sc; rpt from * to within last 2 sc, skip next
sc, dc in last sc. Ch 1 – T.
Row 4: repeat row 2; Ch 3 – T.
Row 5: Skip 2 sc, *4 dc in
next sc, skip next 3 sc; repeat from * across row, end with 3 dc in last sc. Ch 1 – T.
Repeat rows 2 thru 5 for pattern for a length
of 15-inches.
Then work a row of sc along top edge of
blanket – 2 sc in corner, sc along side edge, 2 sc in bottom corner, sc along
bottom edge, 2 sc in corner, and sc along remaining side of blanket, ending
with 2 sc in upper corner. EO MC and attach CC, and work a picot edging around
entire blanket.
Vintage Picot Edging: Make a sc in 3 sts, *ch 3-sl st into top of first ch (picot made), sc in next
3 sts, picot*; repeat from
* to * for pattern.
(3) MOD STAGGERED PICOT DOT
STITCH ANGEL BABY BLANKET
This pattern is truly my very own. I was
dinking around one afternoon trying to think of a pattern I could use that
would be something no one else had done … when I came up with this simple design.
I liked it, so I made another one 😊
I hope you like it too 😉
This pattern uses two colors; MC-Mint (Boy) or
Variegated Pink (Girl) & CC-Blue (Boy) or Pink (Girl)
Terms used:
MC = main color
CC = contrast color
T = turn
ch = chain
sts = stitches
sc = Single crochet
ea = Each
rpt = repeat
EO = end off
I made this little blanket of staggered
picots in one color throughout, using a contrast color for edging trim.
Begin with MC, and make a ch of 62 sts. Work
a foundation row of sc across; ch 3 – T.
Rows 1 & 2: Dc across row. At end of row 2, ch 1 – T.
Row 3: Sc in 3 sc, *in next st, 1 sc, ch 3, sc in same space, sc in next 3 sc; rpt
from * across row, ending sc in last 3
sc. Ch 3 – T.
Rows 4 thru 8: Dc across row. At end of row 8, ch 1 – T.
MOD Picot 'dot' pattern stitch; back of work - making dc thru back of picot.
MOD Picot 'dot' pattern stitch; back of work.
MOD Picot 'dot' pattern stitch; what it looks like from the front of work.
Row 9: Sc in 6 sc, *in next st, 1 sc, ch 3, sc in same space, sc in next 3 sc; rpt
from * across row, ending sc in last 3
sc. Ch 3 – T.
Rows 10 thru 14: Dc across row. At end of row 8, ch 1 – T.
Repeat rows 3 through 14 for pattern for a
length of 15-inches.
Finish Boy Blanket with a Corded
Edging: Along each edge of blanket, work a row of
sc from left to right (backwards) – the stitches will cross over each other at
the top to show a nice looking decorative beaded finish.
Finish Girl Blanket with a
Scallop Loop Edging: Attach yarn at a corner, and
work edging as follows – 1 sc; *ch 3, skip 1 st, 1 sc. Repeat from * around entire blanket edge.
(4) MOD STAGGERED SHELLS ANGEL
BABY BLANKET
I used a variegated yarn for this openwork
shell blanket, but a solid color will work just as well.
For full-size baby blanket, the
pattern uses multiples of 8 +2.
Terms used:
MC = main color
CC = contrast color
T = turn
ch = chain
sts = stitches
sc = Single crochet
ea = Each
rpt = repeat
EO = end off
Make a ch of 80 sts. Work a foundation row of
sc across; ch 1 – T.
Row 1: Sc in first sc, *ch 4. Skip next 3 sc, (sc, ch 3, 2 dc) in next sc, skip
next 3 sc, sc in next sc; rpt from * across row. Ch 3 – T.
Row 2: Dc in 1st st, ch 2, *(sc, ch 3, 2 dc) in next ch-3 loop, sc in next ch-4 loop; rpt from * across row, ending with 1 sc, dc
last 2 st. Ch 3 – T.
Row 3: Dc in 1st st, ch 2, *(sc, ch 3, 2 dc) in next ch-3 loop, sc in next ch-4 loop; rpt from * across, ending with 1 sc, dc in last 2 sts.
Ch 3 – T.
Repeat rows 2 & 3 for pattern to a length
of 15-inches.
Work a row of sc along all edges of blanket (being
sure to incorporate the uneven stitches along the top of the blanket to a st
count of 80, to keep the blanket square).
(5) MOD STAGGERED SQUARES AND
POSTS ANGEL BABY BLANKET
I used a variegated yarn for this openwork
shell blanket, but a solid color will work just as well.
For full-size baby blanket, the
pattern uses multiples of 8 + 5.
Terms used:
MC = main color
CC = contrast color
T = turn
ch = chain
sts = stitches
sc = Single crochet
ea = Each
rpt = repeat
EO = end off
Make a ch of 75 sts. Work a foundation row of
dc across; ch 3 – T.
Row 1: Dc in 1st and 2nd sts, *skip next 2 sts, dc in next st, skip
2 sts, dc in next 3 sts; rpt from * across row. Ch 3 – T.
Row 2: Dc in 1st and 2nd sts, *skip next 2 sts, dc in next st,
ch 3, 3 dc around the post of the single dc of the previous row, skip the next
2 sts, dc in each of the next 3 sts; rpt from * across row; end dc last 3 st. Ch 3 – T.
Row 3: Dc in 1st and 2nd sts, *ch 2, sc in next ch-3 loop, ch 2,
skip next dc, dc in ea of next 3 dc; rpt from * across; end with dc in last 3 st. Ch 3 – T.
Row 4: Dc in 1st and 2nd sts, *skip next ch-2 space, dc in next
sc, ch 3, 3 dc around the post of last dc made, skip next ch-2 space, dc in ea
of next 3 dc; rpt from * across row, ending with dc in last 3 sts. Ch 3 – T.
Repeat rows 3 & 4 for pattern to a length
of 15-inches.
Work a row of dc along top edge of blanket.
Then work a row of sc around entire blanket – having 60 sc down both sides, and
79 across top and bottom (count includes an extra sc worked in all four
corners).
(6) MOD PUFF STITCH ANGEL BABY
BLANKET
I used a variegated yarn for these openwork puff
stitch blankets, but a solid color will work just as well. I used a contrast
color for edging on the girl’s banket.
For full-size baby blanket, the
pattern uses multiples of 3 + 1.
Terms used:
MC = main color
CC = contrast color
T = turn
ch = chain
sts = stitches
sc = Single crochet
sl st = slip stitch
ea = Each
rpt = repeat
YO = yarn over
EO = end off
Special Stitch Pattern – 3-Dc
Puff St: (YO, insert hook in next st, yo, draw
yarn through st, yo. Draw yarn through 2 loops on hook) in same st, yo, draw
yarn through all 4 loops on hook.
For BOY blanket, make a ch of 65 sts: for
GIRL blanket, make a ch of 59 sts (girls edge trim will be large).
Work a foundation row of sc across; ch 3 – T.
Row 1: Dc in 1st sc, skip next sc, *(dc, ch 1, dc) in next sc, skip next 2 sc; rpt from * across row, ending skip next sc
and dc in last 2 sc. Ch 3 – T.
Row 2: Dc in 1st sc, 3-dc puff st in next ch-1 space, (ch
2, 3-dc puff st) in each ch-1 space across row; end 1 dc in ea of last two
dc. Ch 1 – T.
Row 3: Sc in 1st dc, sc in top of puff st, *2 sc in next ch-2 space, sc in
puff st; rpt from * across row, ending with sc in last 2 dc. Ch 1 – T.
Row 4: Sc in ea sc across row. Ch 3 – T.
Repeat rows 1 through 4 for pattern to a
length of 15-inches.
Edge Boy Blanket, work a sc border all around blanket, making an extra sc in ea
corner.
Edge Girl Blanket with a Shell Stitch edging as follows: at a corner, make a sl
st; *skip 2 sts, 5 dc in next st, skip
2 sts, 1 sl st; rpt from * around entire blanket.
(7) MOD V-STICH ANGEL BABY
BLANKET
I worked this little blanket in a solid color
with a contrast color edging.
For full-size baby blanket, the
pattern uses multiples of 6 +4.
Terms used:
MC = main color
CC = contrast color
T = turn
ch = chain
sts = stitches
sc = Single crochet
ea = Each
rpt = repeat
EO = end off
Make a ch of 70 sts. Work a foundation row of
sc across; ch 3 – T.
Row 1: 2 dc in 1st sc, skip next 4 st, *(dc, ch 1, dc) in each of the next 2 sts, skip next 4 sts; rpt from * across row – end with 1 dc, ch
1, and a dc in last 2 sts. Ch 3 – T.
Row 2: 2 dc in 1st sc, dc in next ch-1 space, skip next ch-1
space, *(dc, ch 1, dc) in each of the next 2 dc, skip next 2 ch-1 spaces; rpt from * across row – end with 1 dc, ch
1, and a dc in last 2 sts. Ch 3 – T.
Repeat row 2 for pattern, to a length of
15-inches.
Work a row of sc around entire blanket
(being sure to incorporate the skipped sts along the top edge to a st count of
70 to keep the blanket square), increasing 1 sc in ea corner.
Edge with a Corded Edging, as follows: Along each edge of blanket, work a row of sc from
left to right (backwards) – the stitches will cross over each other at the top
to show a nice looking decorative beaded finish.
(8) MOD SHELLS & FILLET CROCHET
ANGEL BABY BLANKET
I worked this little blanket in a variegated yarn
with a contrast color edging.
For full-size baby blanket, the
pattern uses multiples of 8 + 6.
Terms used:
MC = main color
CC = contrast color
T = turn
ch = chain
sts = stitches
sc = Single crochet
ea = Each
rpt = repeat
EO = end off
Make a ch of 70 sts. Work a foundation row of
sc across; ch 3 – T.
Row 1: *Skip
first 2 sc, 5 dc in next sc, skip next 2 sc, dc in next sc, ch 1, skip next sc,
dc in next sc; rpt from * across row – end skip 2 sc, dc next sc. Ch 3 – T.
Row 2: *Skip
first 2 dc, 5 dc in next dc, skip next 2 dc, dc in next dc, ch 1, skip next
ch-1 space, dc in next dc; rpt from * across row – end skip 2 dc, 1 dc. Ch 3 – T.
Repeat row 2 for pattern to a length of
15-inches.
Work a row of sc around entire blanket
(being sure to incorporate the skipped sts along the top edge to a st count of
70 to keep the blanket square), increasing 1 sc in ea corner.
Edge with a Scallop Loop edging, as follows: Attach yarn at a corner, and work edging as
follows – 1 sc; *ch 3, skip 1 st,
1 sc. Repeat from * around entire
blanket edge.
(9) MOD X-STITCH ANGEL BABY
BLANKET
This little blanket is pretty simple, and
works up fast. The X-stitch looks complicated, but it is not.
I worked my banket in a MC, with a CC trim.
Terms used:
MC = main color
CC = contrast color
T = turn
ch = chain
sts = stitches
sc = Single crochet
tr = treble stitch
ea = each
rpt = repeat
EO = end off
Special stitch pattern – X-Stitch: to make this stitch from your starting point, skip 1 st, tr in
next … and working behind this st, work a tr st in the skipped st (this
makes a crossed st, with front post dominant).
BOY: Make a ch of 62 sts. Work a foundation row of
sc across; ch 3 – T.
Rows 1 thru 4: Dc across row. Ch 3 – T.
Row 5: Dc across row; ch 4 – T.
Row 6: Tr in 1st dc, *make an X-stich over next 2 dc (refer
to special stitch instructions, above); rpt from * across row: you should
have 29 X’s across row – end row with dc in last 2 dc. Ch 3 – T.
Row 7 thru 17: Dc across row. Ch 4 – T.
Row 18: Rpt row 6. Ch 3 – T.
Rows 19 thru 29: Dc across row.
Work 1 row sc around entire blanket, adding
an extra sc at each corner. EO MC and attach CC.
Edge Boy Blanket with a Smokestack
Picot edging: Attach CC yarn at a corner, and
work edging as follows – 1 sc in next 3 sts, *ch 4-1sc in 2nd ch from hook-1 ch, skip 1 st, 1 sc in
next 3 sts*; rpt from * to * around entire blanket.
GIRL: Make a ch of 62 sts. Work a foundation row of sc across; ch 3 –
T.
Rows 1 thru 4: Dc across row. Ch 3 – T.
Row 5: Dc across row; ch 4 – T.
Row 6: Tr in 1st dc, *make an X-stich over next 2 dc (refer
to special stitch instructions, above); rpt from * across row: you should
have 29 X’s across row – end row with dc in last 2 dc. Ch 3 – T.
Rows 7 thru 12: Dc across row. Ch 3 – T.
Row 13: Dc across row; ch 4 – T.
Row 14: Rpt row 6. Ch 3 – T.
Rows 15 thru 20: Dc across row. Ch 3 – T.
Row 21: Dc across row; ch 4 – T.
Row 22: Rpt. Row 6. Ch 3 – T.
Rows 13 thru 27: Dc across row.
Edge Girl Blanket with a pretty Vintage
Lacey Picot edging: With CC, start in 3rd
st from a corner, with a sc; *skip 2 st, dc in next st, ch 3-sl st in 1st ch (this
makes a picot), dc in same st, work a picot, dc in same st, make a picot, dc
in same st, skip 2 st, 1 sc in next st; rpt from * across top of blanket – you have
11 ct. lacey picots; work sc st down side of blanket; work 11 ct. lacey picots
across bottom of blanket; and finish with sc st’s up side of blanket. EO
(10) MOD FORGET-ME-NOT ANGEL BABY
BLANKET
This little blanket is pretty simple, and the
pattern name fits …
For full-size baby blanket, the
pattern uses a multiple of 3 + 1.
Terms used:
MC = main color
CC = contrast color
T = turn
ch = chain
sts = stitches
sc = Single crochet
ea = each
rpt = repeat
EO = end off
Make a ch of 62 sts. Work a foundation row of
sc across; ch 3 – T.
Row 1: (1 dc, ch 2, 1 sc) in 1st st, *skip 2 sts, (2 dc, ch 2, 1 sc)
in next st*; rpt from * to * across row – end 1 dc-ch 2-1 sc
in last st.
Row 2 & following rows: Ch 2, (1 dc, ch 2, 1 sc) in ch 2 space of previous row,
*(2 dc, ch 2, 1 sc) in ch 2 space of previous row*; rpt from * to * across row – end 1 dc-ch 2-1 sc in last st.
Work to a length of 15-inches.
Edge with a Irish Picot Edging – Attach CC to a corner and work as follows: *1 sc over the next 3 sts – take hook
out of last ch, insert it in the 1st ch … pick up the loop just
left, and draw it through loop on hook*; rpt from * to * around entire blanket.
(11) MOD POST PANEL ANGEL BABY
BLANKET
I designed, and worked this little blanket up
last night – it went quickly.
Terms used:
MC = main color
CC = contrast color
T = turn
ch = chain
sts = stitches
sc = Single crochet
ea = each
rpt = repeat
EO = end off
Make a ch of 62 sts. Work a foundation row of
sc across; ch 3 – T.
Row 1: Dc across row. Ch 3 – T.
Row 2: Dc in 1st and 2nd dc, make a post st around
dc of previous row, *dc in
next 6 dc, post*; rpt from
* to * across row – end dc in last 3
dc. Ch 3 – T.
Repeat rows 1 & 2 for pattern to a length
of 15-inches.
Edge with a Irish Picot Edging – Attach CC to a corner and work as follows: *1 sc over the next 3 sts – take hook
out of last ch, insert it in the 1st ch … pick up the loop just
left, and draw it through loop on hook*; rpt from * to * around
entire blanket.
And that was the last little blanket: the box
is now full, and ready to be mailed off 😊