
Tonight, I finally finished up the last of my 6-pc. Set of Fingertip Towels 😊
I trimmed the towels with vintage edgings patterns: I like to try new things – and now, with so much free time on my hands (no husband, no kids, no grandkids vying for my attention), it seemed like a good time to try these intricate pattens.
I have modified the original vinatge patterns to fit my towel design proportions.

People ask me, “What is a fingertip towel?”
When I was first asked that question … I thought, ‘am I really that old?’
Apparently so: because a lot of people have no idea ☹
A fingertip towel is a small-sized hand towel, used as a handy and quick ‘fingertips’ drying item in the spare bathroom (but I like them too, so I make myself a set also 😊): their size is ideal for drying hands after washing up. This guest towel is smaller than a regular hand towel – but larger than a wash cloth 😉
Some hostesses simply drape their fingertip towels over a bathroom towel bar; but I like to roll mine and place them in a woven rope basket within easy reach of the sink faucet.
I also like to make my fingertip towels decorative. Since I started making these little hand towels in March of 2019, I’ve gone from a simple knitted towel, to towels with intricate border designs … to the towels I recently finished: knit towels with a fancy crochet trim edging – I like these ones 😊
The others were nice, but they were just basically functionable items; these ones are a pretty addition to the bathroom vanity countertop. Plus, I enjoyed working the trim designs.
Fingertip Towels generally measure 11-inches wide x 18-inches long; my finished towels (without trim) measure 12¼-inches square (12¼-inches x 14-inches with trim), and so far, I haven’t had any complaints concerning the sizing. But, if you want a larger towel, just extend the length to your personal preference.
I posted MOD Fingertip Towel Pattern to my Blog 2½ weeks ago (https://jeastofeden.blogspot.com/2022/04/mod-fingertip-towel-w-pom-pom-edging.html): the only thing that has changed with that design, is the trimmed edgings on these newer designs.
I hope you enjoy making these little towels.
The trim edgings look more complicated than they actually are to make.
Have fun! 😊
1) Rolled Blue-striped Towel with Yellow Pom-pom Edging: Original Post, posted above.

2) Pink Striped Towel with Green Shell-Picot Edging: Work towel as in original towel post, then trim as follows –

Terms Used:
Sc = single crochet
St = stitch
Ch = chain
Dc = Double crochet
P = Picot
Sk = skip
Rpt = repeat
With #D hook, and Aunt Lydia Crochet Cotton thread – Classic 10. (Row 1) begin foundation sc by working on back of work; attach crochet thread to front loop of first sc, and work 1 sc in front and back loop of that same sc: 98 sts across towel edge; ch 3, turn.

(Row 2) *2 dc in next st, ch-4 p, 2 dc in same sc, sk 3; rpt from * across row.
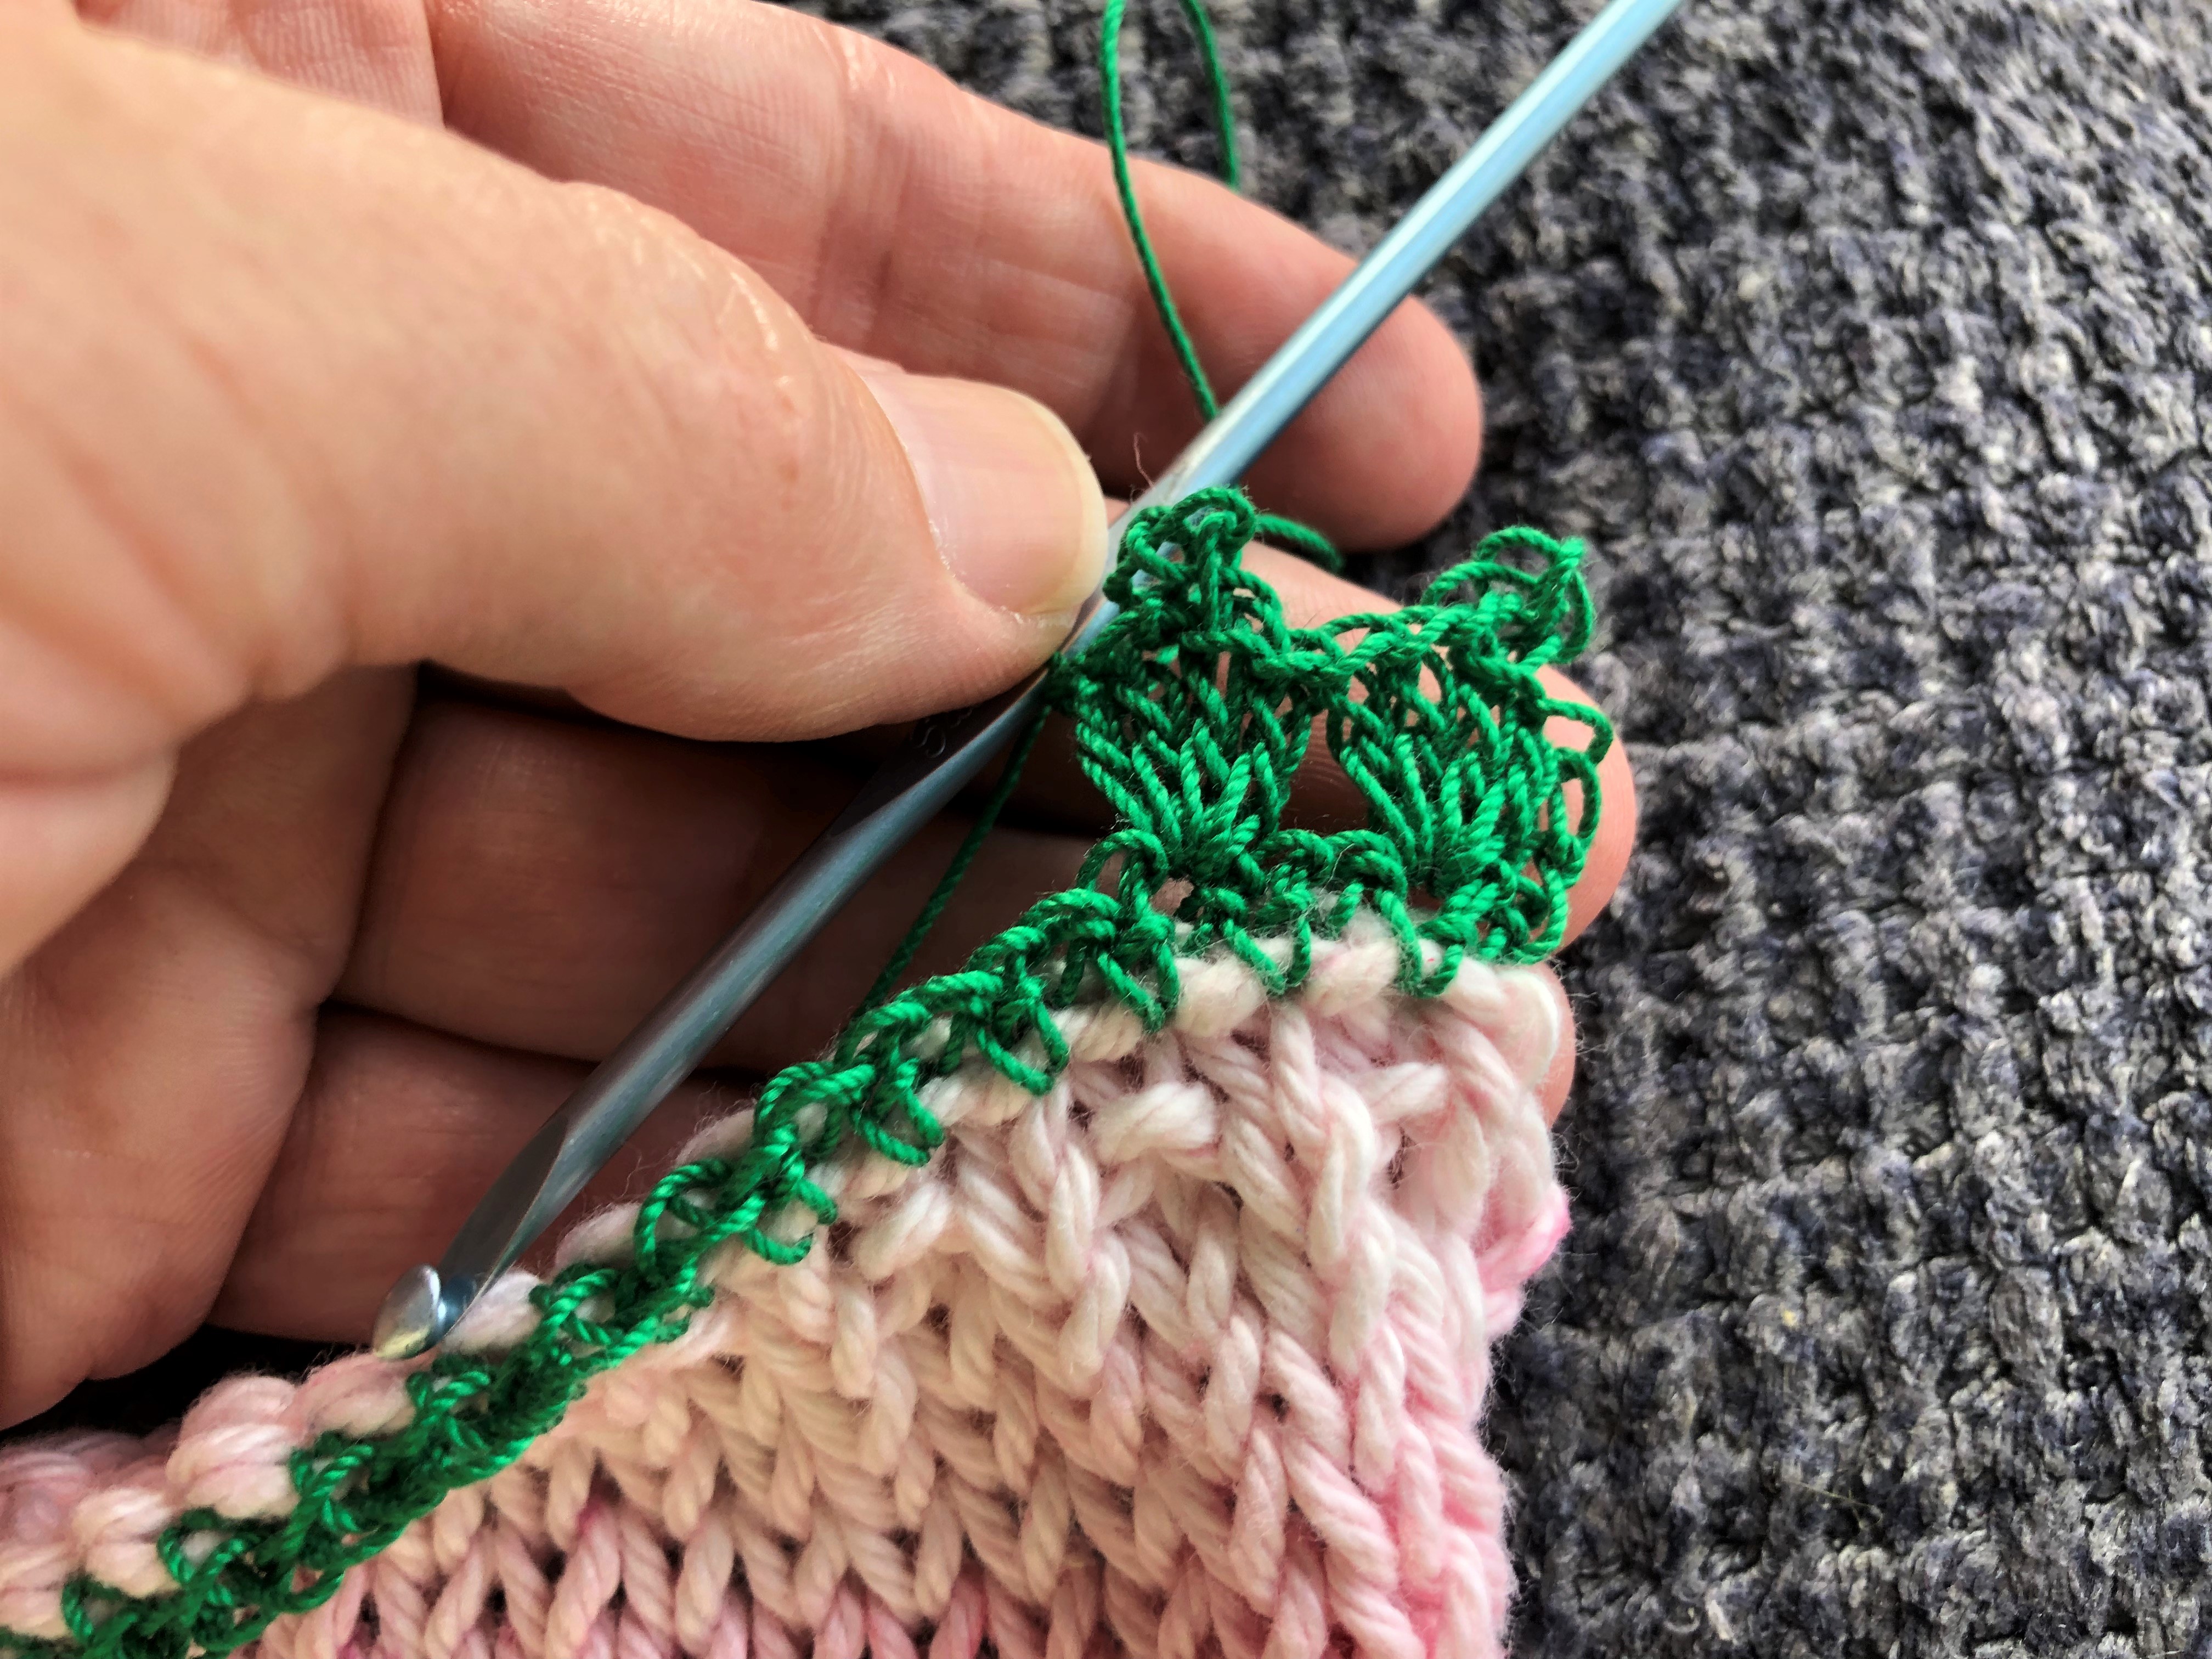
You should have 25 shell picots across towel edge.
Repeat pattern on other edge of towel.

3) Purple Variegated Striped Towel with Lilac Crescent Picot Trim Edging: Work towel as in original towel post, then trim as follows –

Terms Used:
K = knit
P = purl
St = stitch
Sc = single crochet
Ch = chain
Sl st = slip stitch
P = Picot
Sk = skip
Rpt = repeat
For my towel as shown in the picture, I ran out of the variegated yarn, so I finished my towel with a 3¼-inch white contrast cotton yarn in a simple seed stitch patten … I think it turned out pretty nice 😊
Simple Seed Stitch Pattern: Attach white cotton yarn, and work as follows – (Row 1) *K 3, P 1*; repeat across row (Row 2 & ALL alternate rows) P (Rows 3 & 7) K (Row 5) K 1, *P 1, K 3* – rpt across row; end P 1, K 2. Repeat rows 1 thru 5 for established seed st pattern.
Crescent Picot Edging Pattern: With #D hook, and Aunt Lydia Crochet Cotton thread – Classic 10. (Row 1) begin foundation sc by working on back of work; attach crochet thread to front loop of first sc, and work 1 sc in front and back loop of that same sc: 98 sts across towel edge; ch 1, turn.
(Row 2) Sc in each of the next 3 sts, ch-4 and sl st in top of last sc made: p; *sc in each of next 3 ch, ch-9, turn. Sc in 3rd sc following p, turn. IN loop make: 3 sc, p, 2 sc, p, 2 sc, p, 2 sc, p, 3 sc. Sc in each of next 6 ch of foundation sc, p*. Repeat from * to * across row.


You should have 11 crescent p’s across towel top edge.
4) Pink & Green Variegated Striped Towel with Pink Picot Cresents Trim Edging: Work towel as in original towel post, then trim as follows –

Terms Used:
K = knit
P = purl
St = stitch
Sc = single crochet
Ch = chain
Sl st = slip stitch
P = Picot
Sk = skip
Rpt = repeat
For my towel as shown in the picture, I ran out of the variegated yarn, so I finished my towel with a 1½-inch green contrast cotton yarn in a simple moss stitch patten … I think it turned out pretty nice 😊
Simple Moss Stitch Pattern: Attach green cotton yarn, and work as follows – (Row 1) *K 1, P 1*; repeat across row (Row 2) As row 1. Repeat rows for established moss st pattern. NOTE: If row ends with k 1, the next row will begin with a k 1 … or visa versa.
Picot Crescents Edging Pattern: With #D hook, and Aunt Lydia Crochet Cotton thread – Classic 10. (Row 1) begin foundation sc by working on back of work; attach crochet thread to front loop of first sc, and work 1 sc in front and back loop of that same sc: 98 sts across towel edge; ch 1, turn.
(Row 2) Sc across row.

(Row 3) *Ch 5, sk 5 and sl st to next st*; rpt from * to * across row.

(Row 4) In each ch-5 space make: 2 sc, ch-5, 2 sc, ch-5, 2 sc, ch-5, 2 sc; rpt across row.


You should have 23 picot crescents across towel top edge.
5) Green Striped Towel with Mint Bobble-Shell Edging: Work towel as in original towel post, then trim as follows –

Terms Used:
Sc = single crochet
St = stitch
Ch = chain
Dc = Double crochet
Sk = skip
Rpt = repeat
With #D hook, and Aunt Lydia Crochet Cotton thread – Classic 10. (Row 1) begin foundation sc by working on back of work; attach crochet thread to front loop of first sc, and work 1 sc in front and back loop of that same sc: 98 sts across towel edge; ch 3, turn.
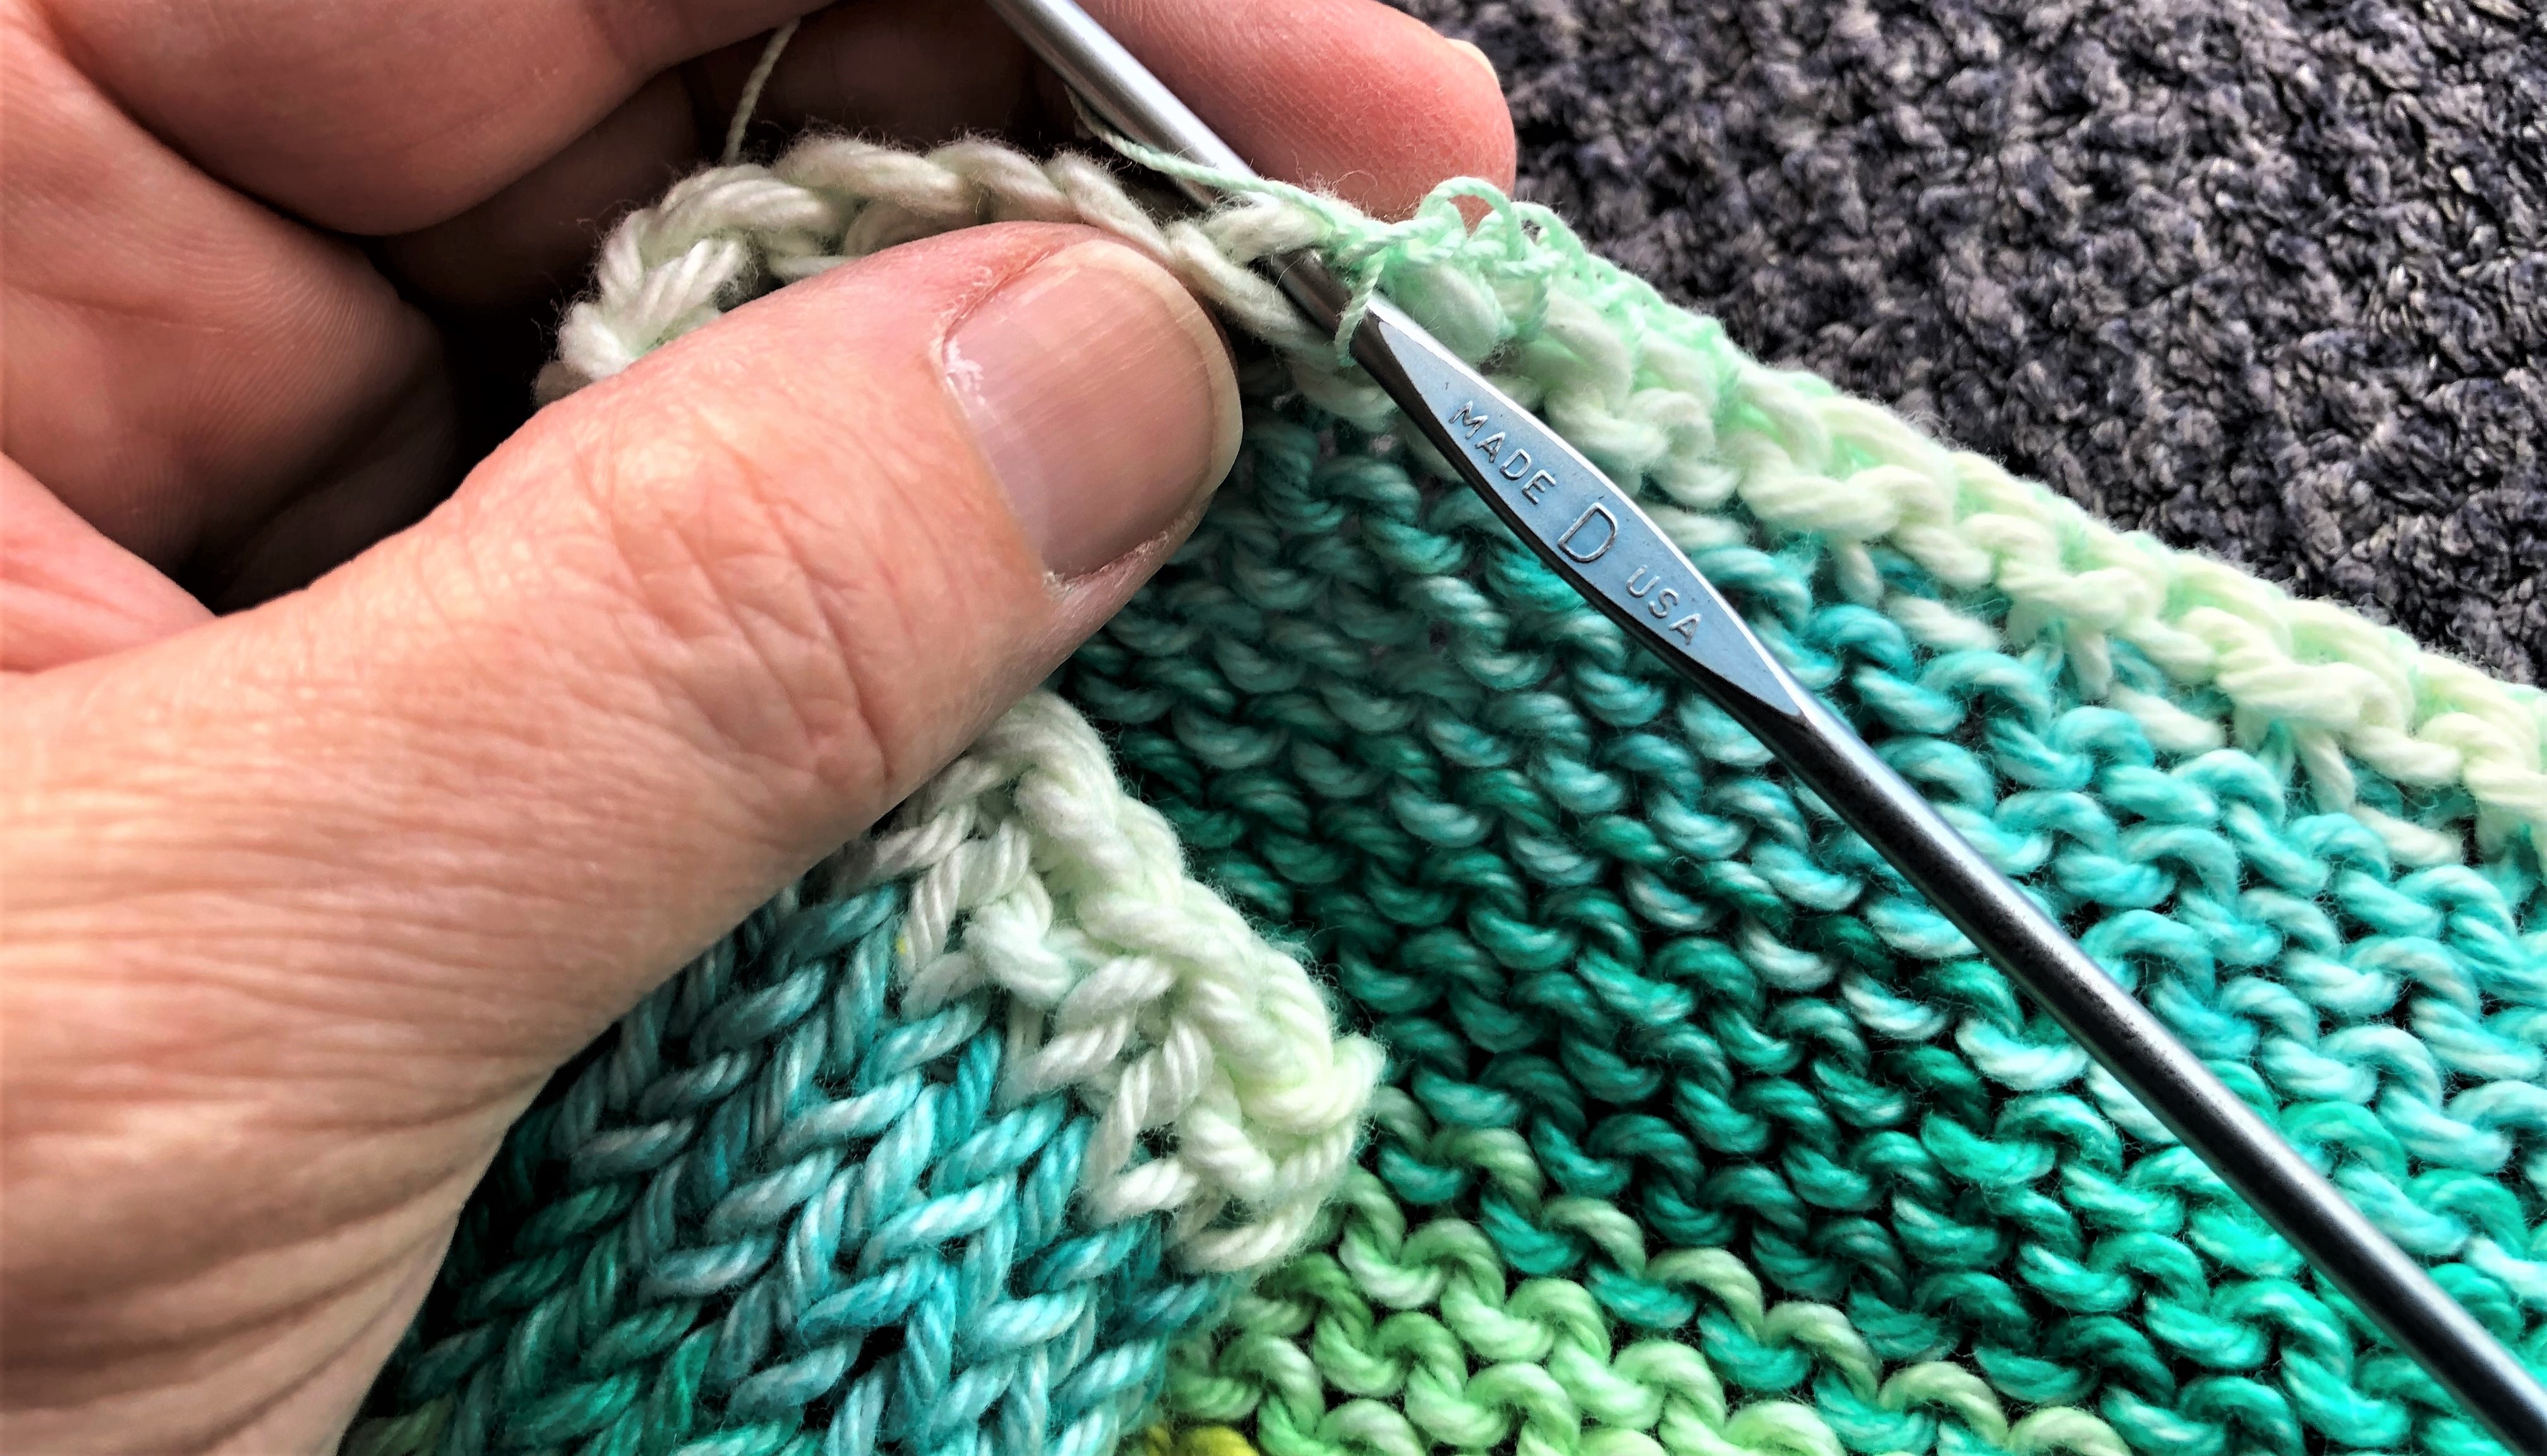


(Row 2) In 1st sc, make 5 dc in same st (when making a bobble st, always hold the last st of each dc on the hook; then finish last dc by pulling thread through all loops on hook – cluster made). *Ch 2, make 9 dc in top st of bobble (scallop made), sk 3 sc, dc in next st, make a bobble st in same st, and rpt from * across row.
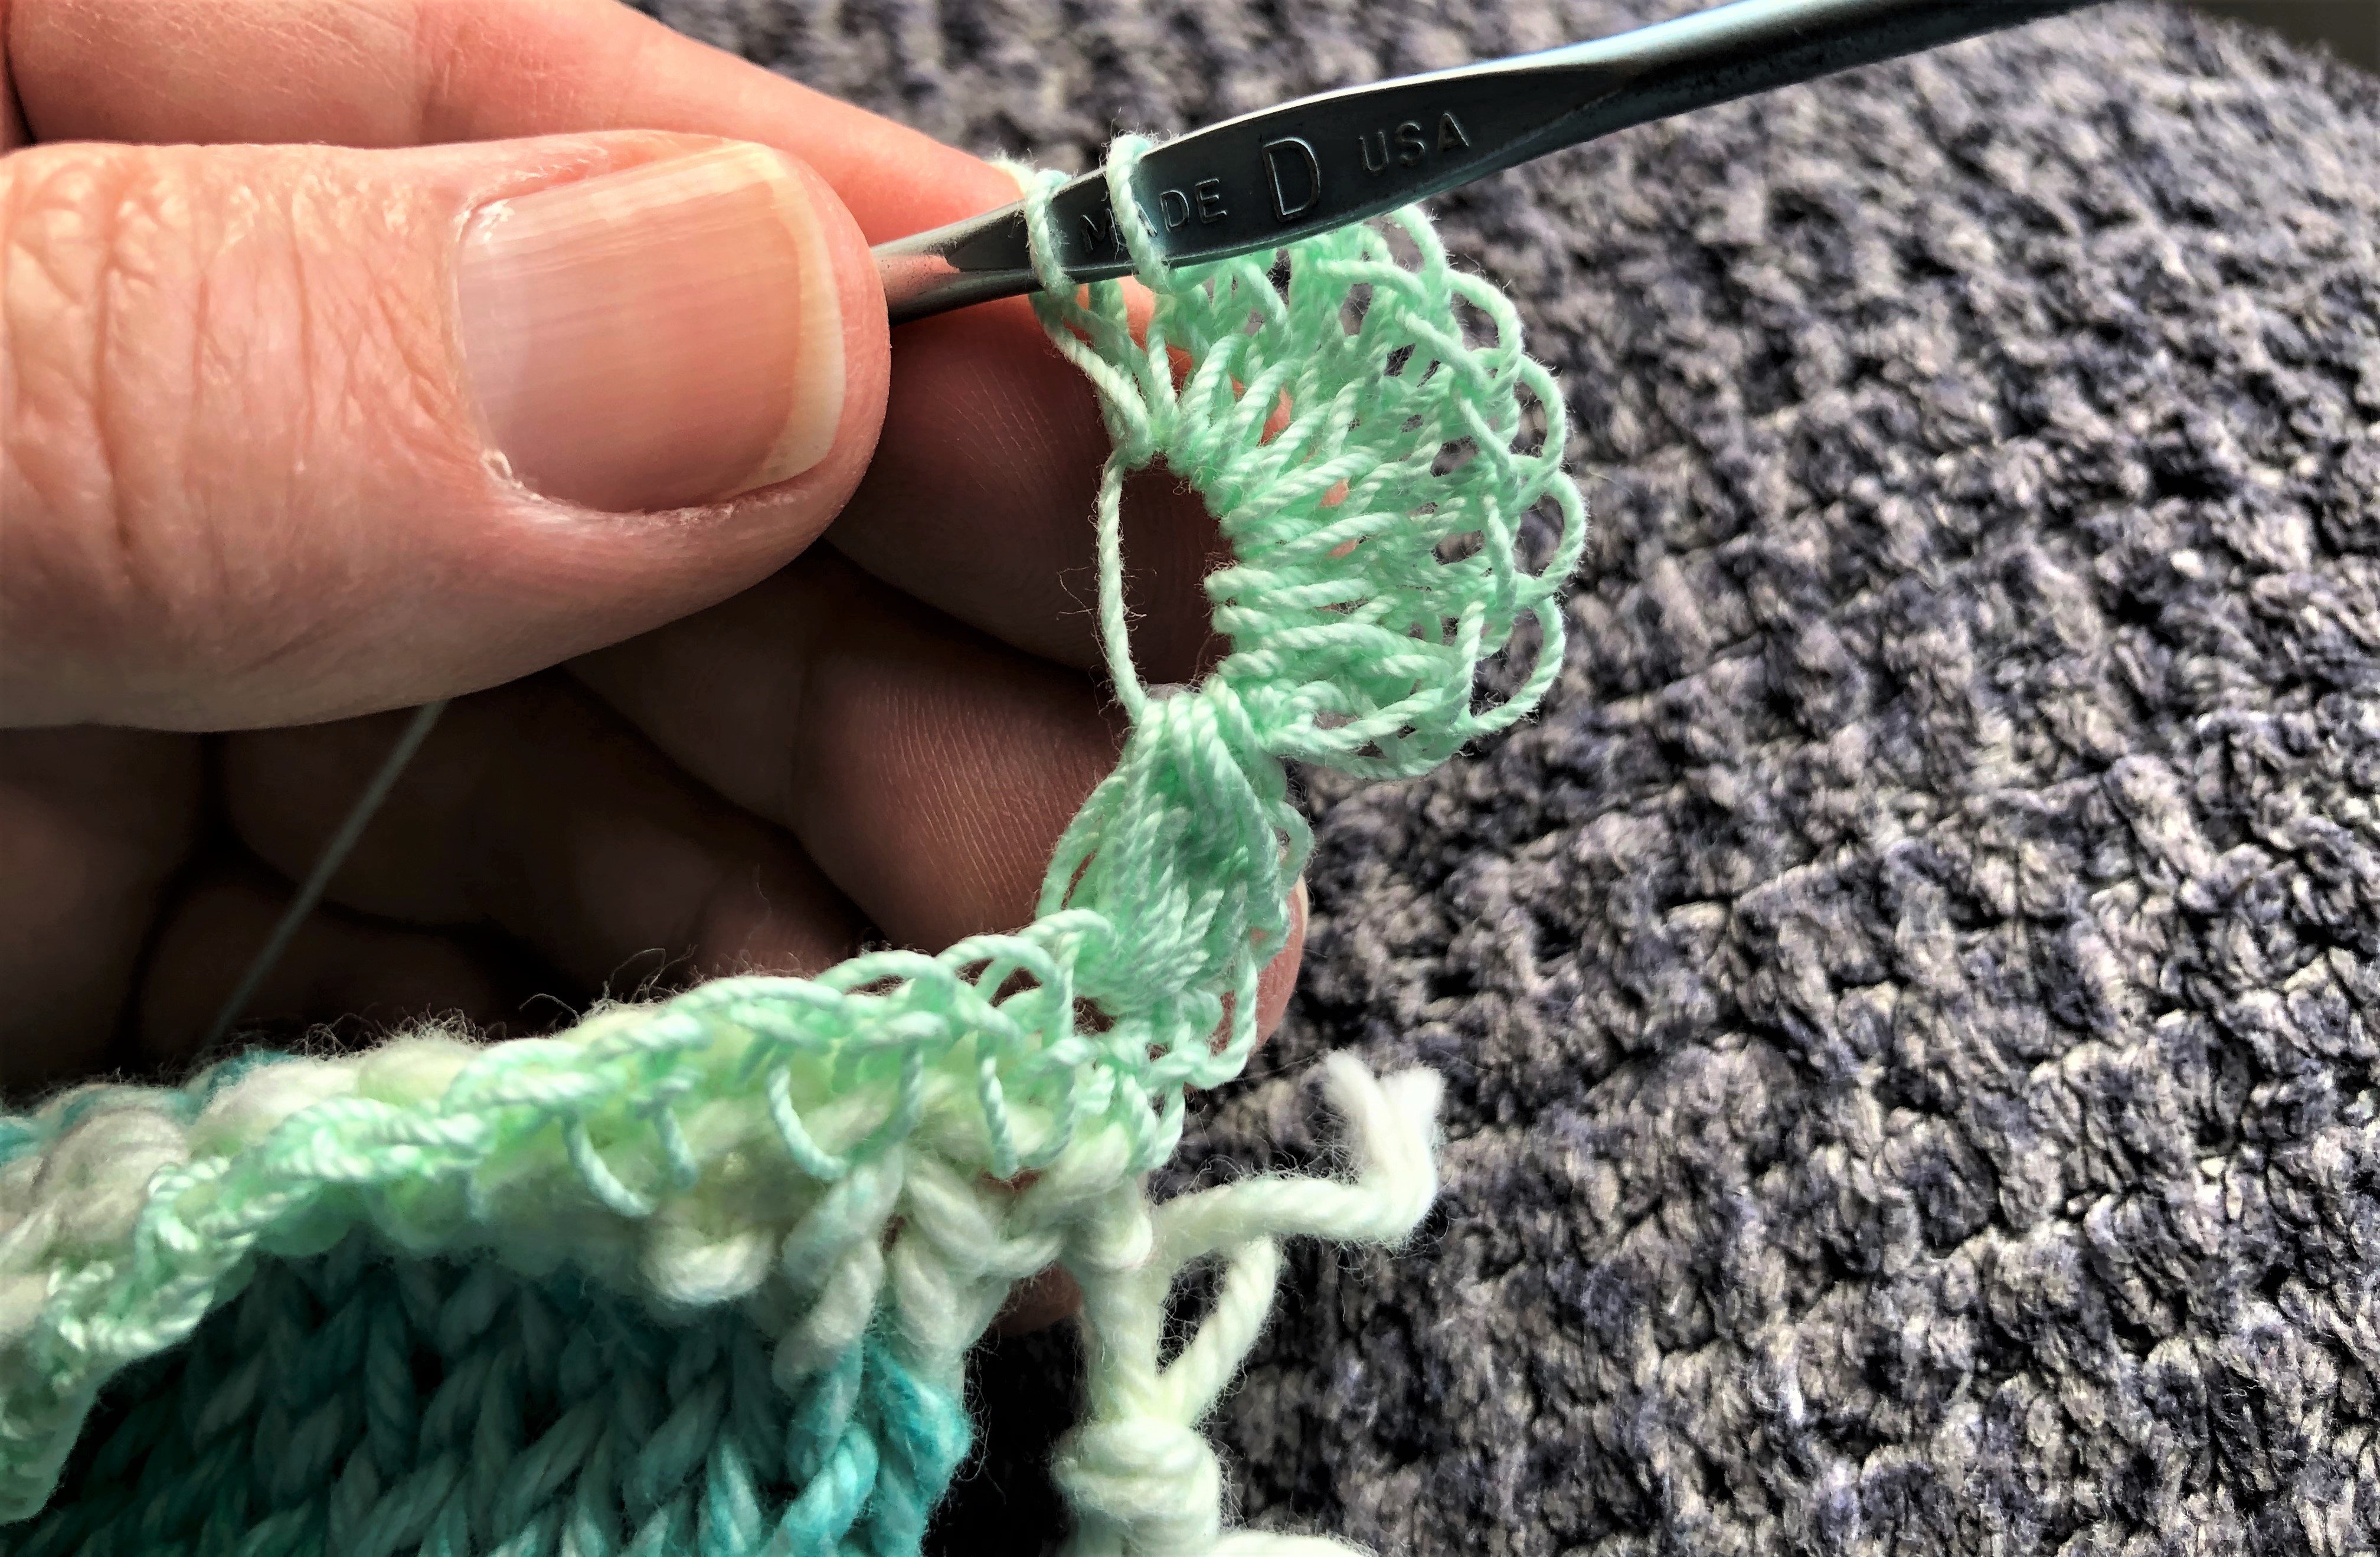

You should have 25 bobble-scallops across towel edge.

Repeat pattern for other edge of towel.
6) Multi-Colored Variegated Towel with Purple Flower Tower Edging: Work towel as in original towel post, then trim as follows –

Terms Used:
Sc = single crochet
Ch = chain
St = stitch
Sk = skip
Sl St = slip stitch
Rpt = repeat
With #D hook, and Aunt Lydia Crochet Cotton thread – Classic 10. (Row 1) begin foundation sc by working entirely on back of work; attach crochet thread and sc across towel top edge; making a distinctive ‘lined’ hemline on front of towel – sc 98 sts across towel edge; turn.


(Row 2) With right side of work facing, *ch 10, slip hook out of last ch and insert in 6th ch from hook, catching free st and pulling it thru to form a ring loop, (ch-5, 1 sc in ring; rpt 5 times for a total of 6 ch-5 ‘petals’), ch 5, 1 sl st in st at base of ring: ch 4, sk 3 sts – sl st in next st and next 4 sts*; rpt from * to * across row.


You should have 24 flower towers across towel edge.

Repeat pattern for other edge of towel.
Now you have a nice set of fingertip towels to display to your guests … or to indulge yourself, with 😊
It was fun making these vintage trims; and I think you’ll enjoy making them too.


.jpg)


